Hey my loves!
I know its been a while since I last posted but there has been a lot happening – I moved house, left my job and am currently deciding on what exactly my future holds for me – career wise. So yes, the head has been a little full of other less creative things. However, someone who I care about mentioned to me he hadn’t seen me post much lately about my makeup business or anything on my blog and that in fact miss seeing me be excited about it – and you know what? I agreed 100%. So having that one simple conversation really revved my creative juices up and… I’m back baby! OH YEAH!
So here we go… As we all know its coming up to the “silly season” where we are all getting invitations thrown at us left right and centre. I know we all have our go to looks, but in my opinion now is the time to try adding a pop of colour you might not have worn before, slapping on a bold lip – or dare I say it… adding some glitter? Just promise me you wont do all three 😉 Over the next couple of weeks I’ll post various different looks and hopefully you can get some inspiration from them and replicate it or make it your own.
I was recently given (very generously) as a farewell present from my old work, one set from the Objects of Affection Holiday Collection by MAC Cosmetics. It is the Silver + Blue + Pigments + Glitter colours. So using one of my new pigments from this range in combination with some other MAC eyeshadow’s… here is the look I came up with. This is perfect for any night-time event/Xmas party.
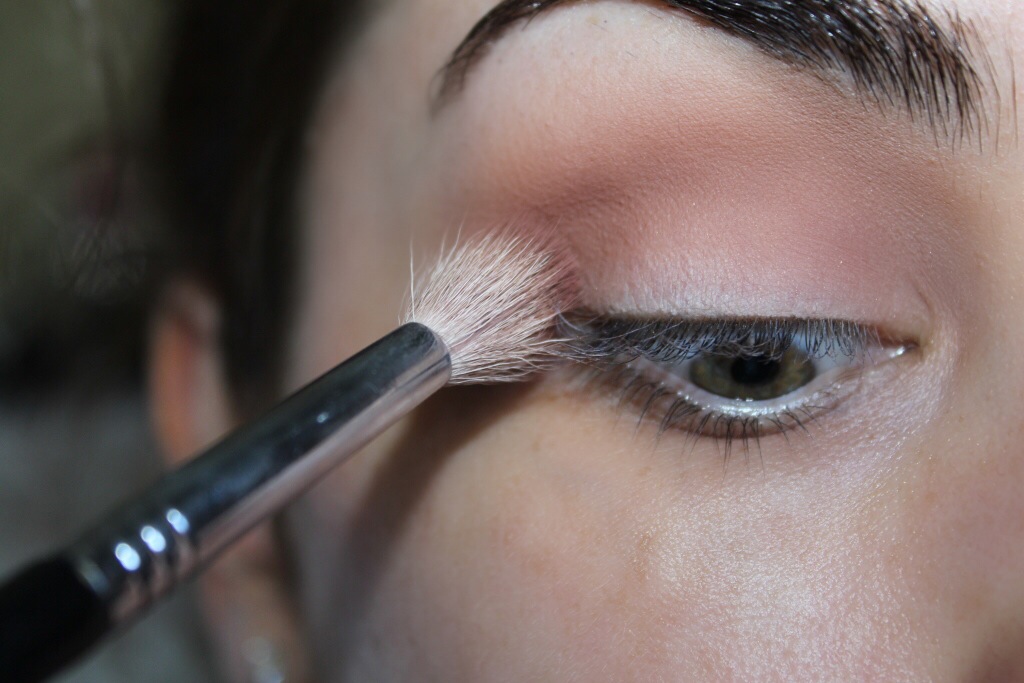
~ STEP 1 ~
As aways we prime the eye… I am using a combination of Too Faced Shadow Insurance with MAC’s Paintpot in Painterly over the top. This combination is my go to for me AND all my clients. The Shadow Insurance helps prevent that nasty creasing you get if, like me, you have hooded eyes and Painterly helps block out any veins you might see on your lid and gives you a clean canvas to work with. Next taking a big fluffy blending brush, I like to use my Sigma E40 Tapered Blending Brush and I take a mixture of Peach Smoothie and Beaches and Cream by Makeup Geek and blend that all over my lid and up to my brow bone.

~ STEP 2 ~
Taking my Sigma E25 Blending Brush and a mixture of the shades Creme Brulee by Makeup Geek and Bamboo by MAC I place it directly into my crease blending upwards (until it is seemless) as this will be our transition shade.
~ STEP 3 ~
To darken my crease, and add some dimension I take the shade Handwritten by MAC and my Sigma E45 Small Tapered Blending Brush and place this directly into my crease and blending till there are no harsh lines. By placing a dark shade here and bending into the earlier placed colours it will make the transition of the dark colour we are going to use next much easier.

~ STEP 4 ~
Now, here is my favourite part… the pigment. As I mentioned earlier I got some new pigments from the Holiday Collection, so from that set I am taking the colour Deep Blue Green. The photos do not do this colour justice. It reminds me of MAC’s Blue Brown Pigment, in that it isn’t just one shade, in different lights it look quite green, or blue or beautiful mixture of both. Anyway, here I used my Sigma F70 Concealer Brush to pack it on strong all over my lid in small patting motions so as to keep the colour intense rather than blending it out. Make sure you don’t take this colour up into the crease as we want to keep the transition of colours we placed earlier smooth and visible otherwise you will simply look like Uncle Fester.

~ STEP 5 ~
Then taking that same E45 Small Tapered Blending Brush simply blend the crease shade and the top of where the pigment was place and the two will blend together seemlessly. Now you need to curl your lashes (or not if you don’t want to) and apply your mascara. Here i am actually using a combination of MAC’s Extreme Dimension Lash in Black Extreme and Bobbi Brown’s Smokey Eye Mascara in Black.

~ STEP 6 ~
After I’ve applied my foundation and the rest of my face makeup I take my MAC 214 Short Shader Brush and apply Cocoa Bear by Makeup Geek along my lower lash line – using a clean MAC 239 Eye Shader Brush to blend it out. Taking Deep Blue Green Pigment again and my Liner brush by Hair and Makeup Addiction I use my Fix Plus spray to help intensify the colour and carefully line right underneath my lower lash line.

~ STEP 7 ~
To brighten up my inner corner I use another pigment from the collection called White. I apply this with my Detailer brush (from the Special Eyes Kit) by Hair and Makeup Addiction and place it directly in the inner corners of my eyes blending it out using my Sigma E36 Blending Brush.

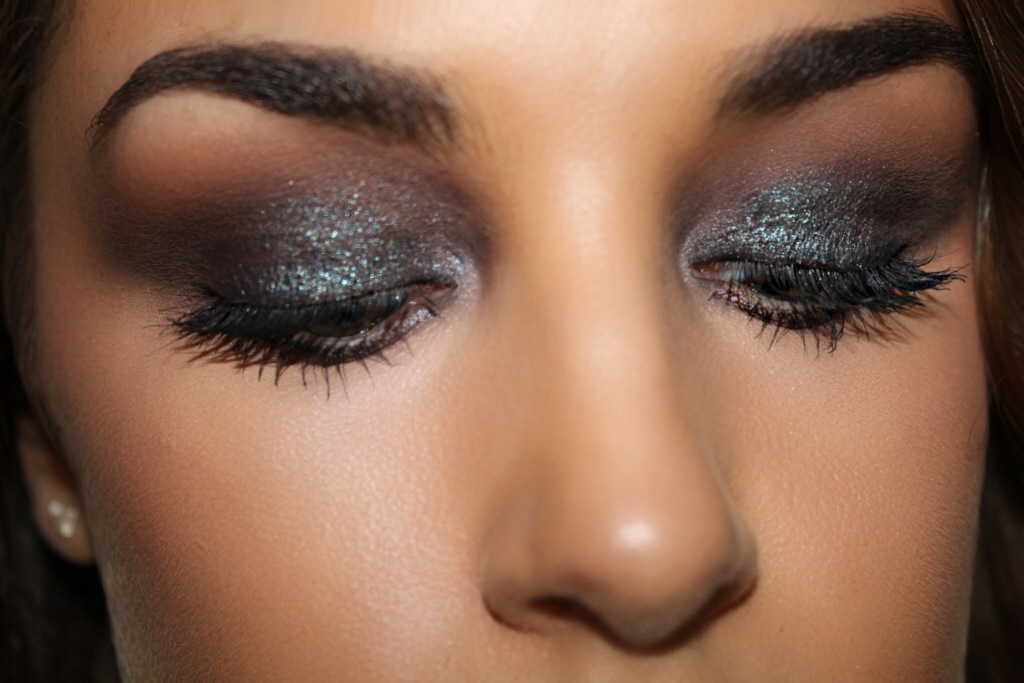
~ TO FINISH ~
I applied a generous coat of mascara to my bottom lashes and hey presto, you’re ready to go and show off those peepers… You could always add some falsies if you wanted too but I don’t like to wear them too much.

So tell me, what did you think of this look? Would you be game to show this off at your next Holiday party?
Till next time
xoxo

Hi Krystle
I always like your makeup-looks! 🙂 I saw that you have a Youtube-Channel. Are you going to post some videos about how you do your makeup looks? I think this would be great! 🙂 But I understand if it takes too much time to do that.
I wish you already a happy new year.
Greetings from Switzerland
Stephanie
Oh wow thank you gorge! Much appreciated! Im actually just working on finalising a post to put up tomorrow 🙂 Sorry theres been a lag but Ive been so sick… Anyway I do have a YouTube channel and I was actually contemplating starting to make proper videos… so its awesome to hear that you would love to watch them.
Hope you had an amazing new year hun and I hope you’ll keep reading my blog.
xxxx
I hope you are well and that the sickness was not too serious?!
That is great! I’m looking forward to your YouTube channel. I’m sure you’ll have a lot of followers. 🙂 I’m already following you.
I wish you an amazing new year too! And I’ll keep reading your blog, that’s for sure. 🙂