So it was my gorgeous friend Ellie’s hens party this Saturday just gone, and her best friend, now also now a dear friend of mine, planned the whole thing herself and it was awesome – so much fun was had by all. The theme was Great Gatsby/1920’s Flapper and all the girls that went really got into it which was great – some went the traditional route, but not me… I chose to put my own spin on it – naturally 😉 So if you’ve been invited to go to one of these type of themed parties and are looking for something a little different and “non-traditional” then read on to see what I came up.
~ MAKEUP ~
The roaring ’20s were both extremely racy and dramatic. With harsh make-up and short bobbed hair, the ladies of the 1920s were set to make an immense impression upon the world, and upon the history of beauty. According to my research (thank you Google ;)) Make-up was scarce during WWI, but the end of the war and the economic boom of many western countries, resulted in a decadent decade of dressing up, dancing and partying. So I perused some different options and came up with the following inspiration of both modern and traditional:
As you can see the women of the 1920’s embraced the bold eye and bold lip and paired them together. So if you’re interested to see what i came up with and how I did it… READ ON 🙂
~ STEP 1 ~
As I am going to be using bold shades and i want them to last without creasing i am going to need a strong eyeshadow primer/base that also acts as a blank canvas. Here I am using Urban Decay’s Eyeshadow Primer Potion in Eden. I take a small amount (which goes a long way with this product) and place that all over my lid using my Sigma P80 brush and blend that all over my lid and up to my brow bone. Taking a neutral shade, I blend that all over my lid and up to my brow bone – I used Blanc Type by MAC Cosmetics – This just sets the primer and will make it easier to blend the dark shades I plan to use.
~ STEP 2 ~
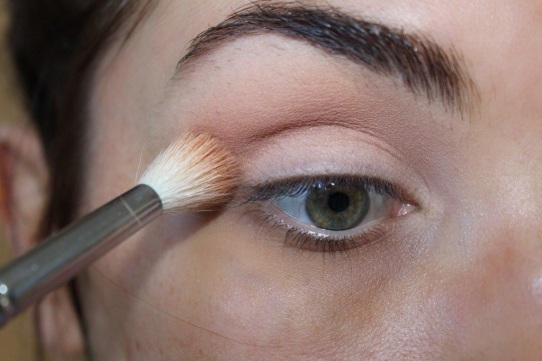
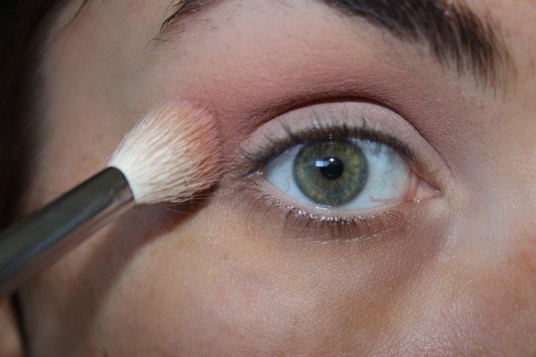
I take a warm neutral shade, for my transition colour and place that above my crease – blending it back and forth in a windscreen wiper motions (I chose to go with a mixture of Beaches and Cream with Creme Brûlée both by Makeup Geek). Next I take the light baby pink shade from my Eyes on the 60s palette by BH Cosmetics and using my go to blending brushe, E35 Tapered Blending brush by Sigma and blend that just beneath where I placed my transition shade – using windscreen wiper motions to blend it out thoroughly. As this was to be a very dramatic look I went back in a few times and added more of the baby pink colour till I was happy with the intensity of it.
~ STEP 3 ~
To further intensify this look I chose to go for a red shade, yes I said RED! LOL! Taking my Crease Brush by Hair and Makeup Addiction and the red shade from the same Eyes on the 60s palette and place that directly into my crease blending it upwards and smoothly into my transition shade. I keep adding to it until I am happy with the intensity of it.
~ STEP 4 ~
After I am happy with the placement of the red shade, I take my NYX Jumbo Pencil in Gold and place that all over my lid, being careful to not take that into my crease. After that I blend out the colour with my finger till it is nice and smooth.
~ STEP 5 ~
Taking a mixture of the light warm brown and the darker brown from the Eyes on the 60s palette I place that over the top of where I put the Gold Jumbo Eye Pencil. I then blend that out and redefine my crease with a clean E45 Small Tapered Blending brush by Sigma. I also take more of the darker shade and concentrate that in my outer V.
~ STEP 6 ~
Next I take Utopia by Makeup Geek (this pigment is AMAZING) and pack it on with my finger – once I am satisfied, I take my Eye Pencil in Black Moon by NARS and line my upper lash line and then smudge it out with my E65 Small Angle brush by Sigma till it has a more smoked out less harsh look. Before I clean up and finish off the look, I got over my transition colour to make sure the red stands out nicely. I also add a bit more of Utopia as I want it really sparkly.
~ FINALE ~
Taking a baby wipe I remove all the fall out from my shadows and pigment – making sure the area is nice and clean ready for foundation. Here I complete my look by curling my lashes using my favourite lash curler by MAC Cosmetics and then apply a couple of coats of Smokey Eye Mascara by Bobbi Brown and Le Volume de Chanel Mascara. Once that has set, I then apply my false lashes (I told you this was an intense look!). The ones I chose are called Girl, You Craazy! by Velour Lashes. I love this brand… you can honestly wear them (provided you take care of them) at least 20 times before having to get a new pair. I actually stop and ask me where I’d got them from. Once they are on and all set, I then take some of the red shade mixed with the dark brown shade from the Eyes on the 60s palette and blend that under my lower lash line with my E21 Small Smudge brush by Sigma and really smoke it out. I apply some the Smokey Eye Mascara by Bobbi Brown on my lower lashes and line my water line with the same Black Moon Eye Pencil by NARS and there you have it! The eyes are done! I then of course applied all my foundation and blush etc. I have also created a little video if you want to check that out also – its fairly basic but you at least you can get an idea of what I’ve been talking about in the steps above…
So I hope you enjoyed this very different and somewhat intense look. I did actually choose to pair this with the Rebel Lipstick by MAC Cosmetics but I forgot to photograph it… SILLY ME! Would love to hear what you think … Next post will be on my hair and how I styled it for this look.
Till next time XOXO


