Hey guys, it was my 30th birthday on Monday and rather than sticking with my normal neutrals I wanted to do something a little different. So, I chose to add a strong pop of colour – below is a quick little step by step tutorial on my birthday makeup 🙂
~ STEP 1 ~
ALWAYS Prep and Prime your skin. I like to prime my skin using my favourite moisturizer Embryolisse 24Hr Miracle Cream – while that is sinking in, I then prime my eyes using Too Faced Shadow Insurance ensuring to blend it into my lid and all the way up to my brow bone with a little along my lower lash line.

~ STEP 2 ~
Taking Creme Brulee by Makeup Geek I use my E45 brush by Sigma and blend it into and above my crease. This will be my transition colour.

~ STEP 3 ~
Using that same brush I take Cocoa Bear by Makeup Geek and blend that into where I placed Creme Brulee – this will help darken up the crease and give me the colour I want.

~ STEP 4 ~
Taking Maybelline’s Colour Tattoo in Painted Purple I use my Hair and Makeup Addiction brush – The Shader – to blend the colour all over my lid but avoiding to go above the crease.

~ STEP 5 ~
Once I had packed on the Colour Tattoo – I then took a purple shimmery shadow from my BH Cosmetics “Eyes on the 60s” palette and packed it on all over my lid with my MAC Cosmetics 239 Eye Shader Brush.

~ STEP 6 ~
Here is where I blend, blend, blend, and then blend some more. I wanted to add some depth to this look so taking my E36 blending brush by Sigma (I find this is amazing for precise placement and blending of colour in your crease) and using Mocha by Makeup Geek I added it just in my crease and outer corner. I made sure I blended this thoroughly and then going back to my E45 brush I used earlier to place Creme Brulee and Cocoa Bear I blended those colours up further above my crease. You do not have to do this, it was just a preference of mine as I like to have my colour up higher. The main aim here is the darken the crease and ensure that there are no harsh lines between the crease and the purple lid – you really want it to blend seamlessly.

~ STEP 7 ~
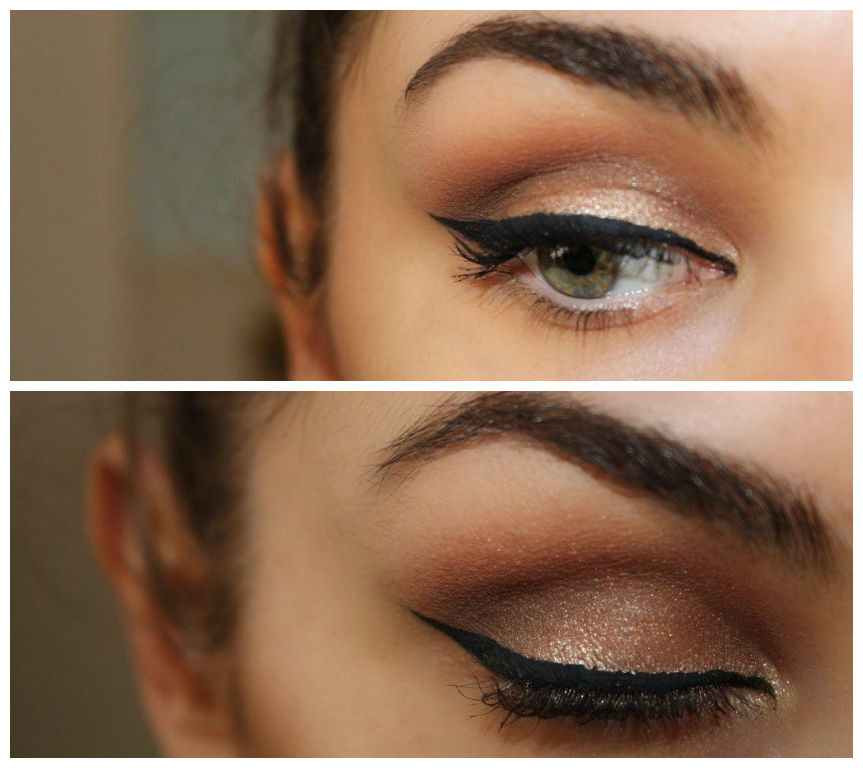
Once I was satisfied with the blending of the colours, I then went on to curl my lashes, draw on my liner out into a cat eye flick, then finishing off with Lashings of Mascara. Again this is my personal preference but I like to apply one coat of Maybelline’s Mega Plush mascra then a coat of Maybelline’s Colossal Volume mascara and then go back in with a third and final coat of the Mega Plush.

~ FINALE! ~
After apply my foundation, concealer, powder etc. I finish off the look by quickly lining my lower lash line and water line with MAC Cosmetics Eye Khol pencil in Tarnish. I then take my pinky finger and just smudge it out a little. Taking Tarnish I re-line my waterline to darken that up more – and there you have it…


I hope you liked it – was something to break up my normal routine of neutrals which I tend to lean towards. If you have any questions, thoughts, ideas or requests please don’t hesitate to leave a comment below. I would love to hear from you.
Till next time xoxo