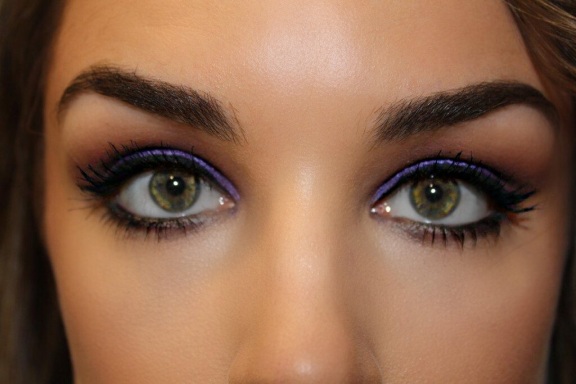
Everyday Sparkle

Hi loves,

It has been forever and a day since I was last on here… Please forgive me – Ive had a lot going on in my life such as moving house, not once but twice, starting a new job, leaving that job and now starting a new one. So… I’ll stop waffling on and get right into my next tutorial…

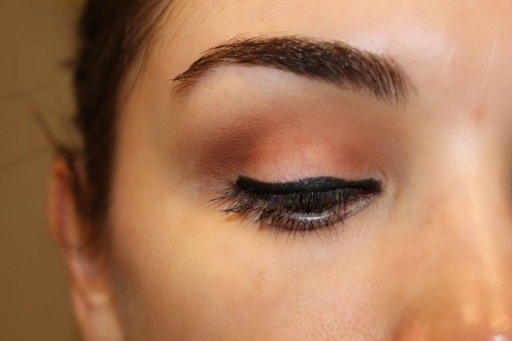
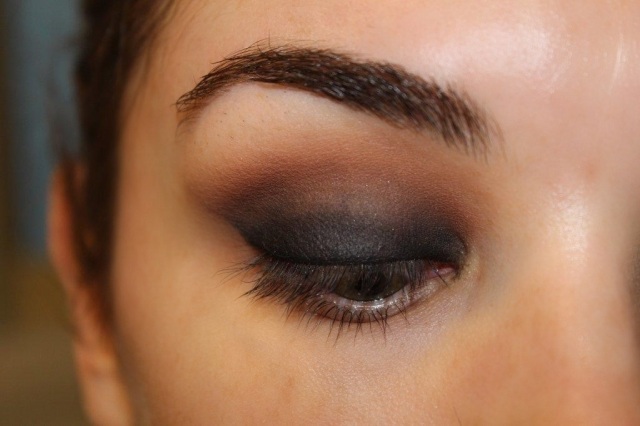
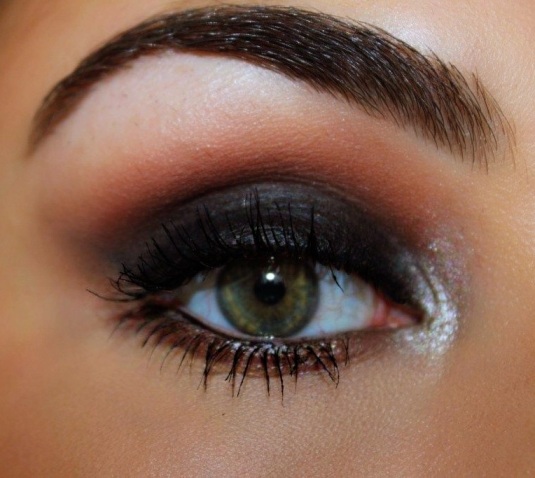
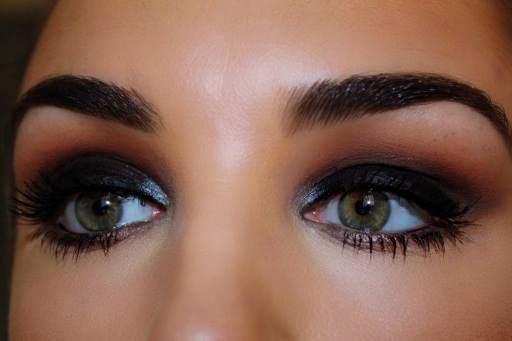
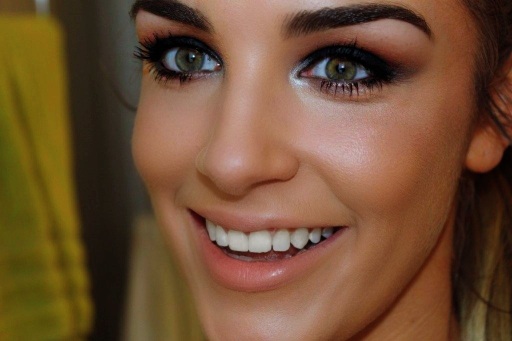
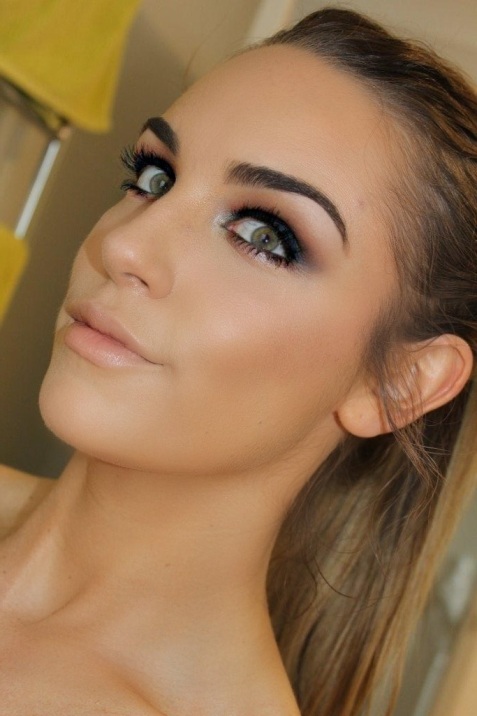
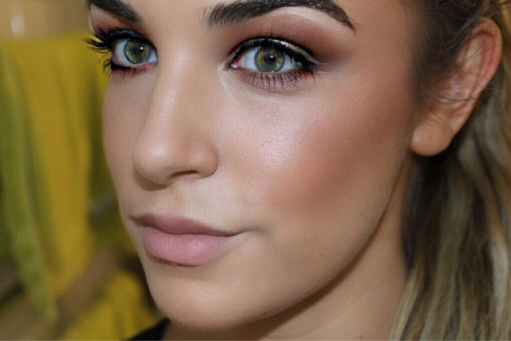
I dont know about you but I love anything sparkly… So I try to incorporate it into as much of my makeup looks as possible which can be hard in the professional working environment 😉 so see below before a step by step on how to incorpate this into an every day look…

~ STEP 1 ~

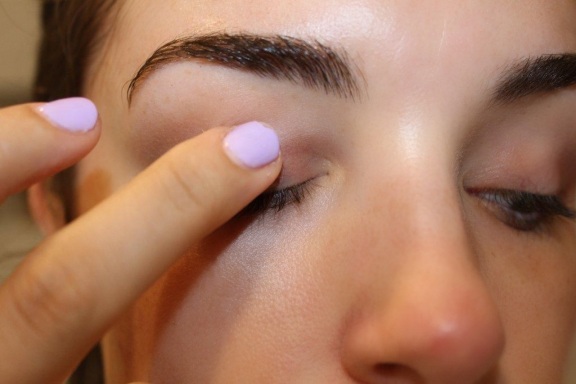
You should always prime your eyes, but if you are using a shimmery shadow – you definitely need to prime! For this I turn to my trusty Shadow Insurance by Too Faced Cosmetics, then applying a thin layer of Soft Ochre Paint Pot by MAC Cosmetics – setting it with Blanc Type shadow also by MAC Cosmetics.


~STEP 2~

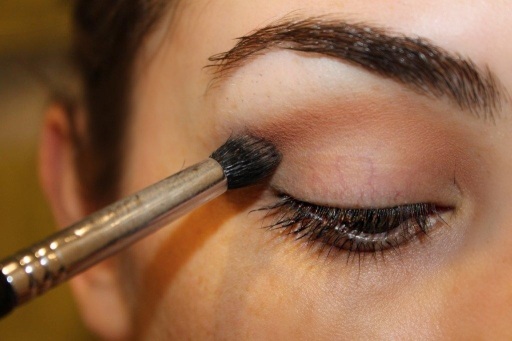
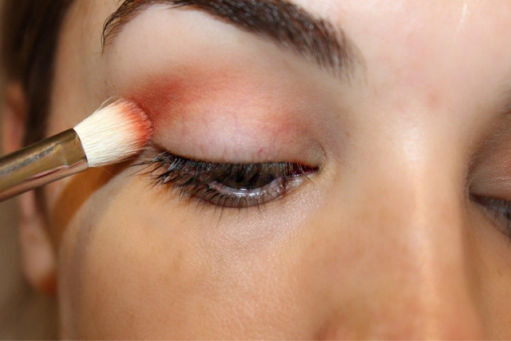
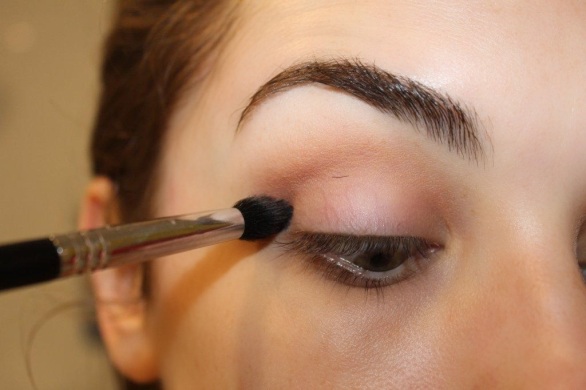
Taking Soft Brown by MAC Cosmetics and my Sigma E40 Tapered Blending Brush and blend that into and above my crease – this will be my base transition shade.

~STEP 3~

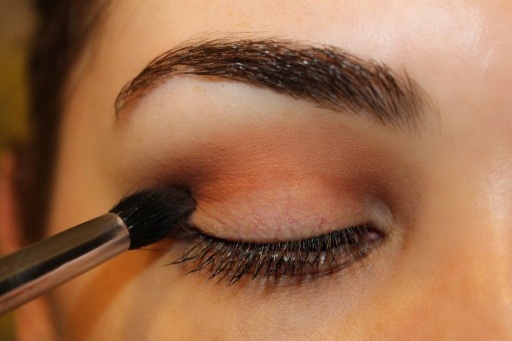
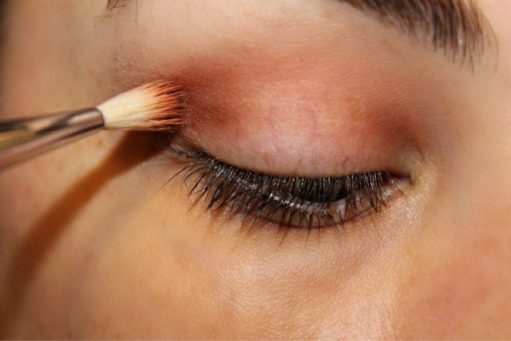
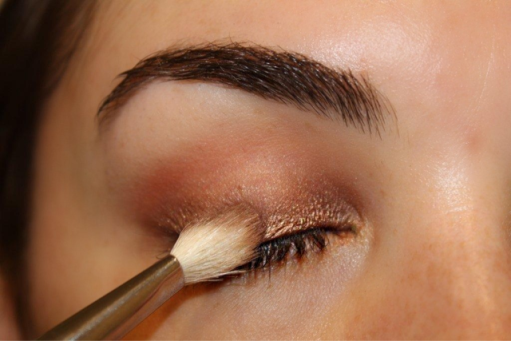
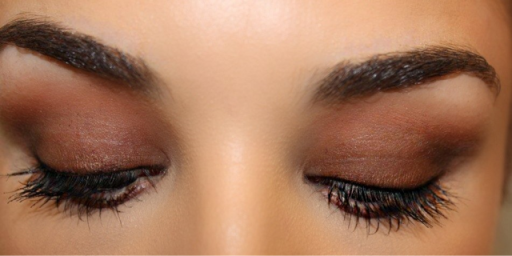
Using the colour Bandit by Colour Pop and my Sigma E35 Tapered Blending Brush I place this directly into the crease – further deepening the colour and getting that rusty brown colour I love.

~STEP 4~
To deepen the outer V and crease further and add a slight smokey effect – I take my E45 Small Tapered Blending Brush by Sigma, and the colour Embark by MAC Cosmetics and blend that into the outer V and partly the way into the crease, blending it out till there are no harsh lines.


~STEP 5~

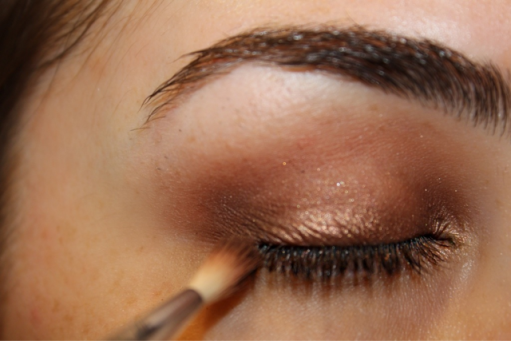
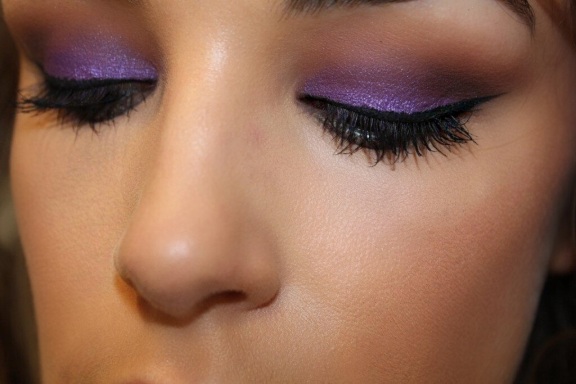
Using my new favourite shadow – I Heart This by ColourPop, I first apply this using my fingers and pack it on – then taking a firm brush (I just used the one from my Urban Decay palette) I smooth out the colour I’ve placed on my lid, then taking a bit more on the same bush, I go over the top – to make it a bit more intense. Taking the same E45 Small Tapered Blending Brush I go over the outer V and some of the crease to ensure the smokey dark colour is prominent.


~FINISH~

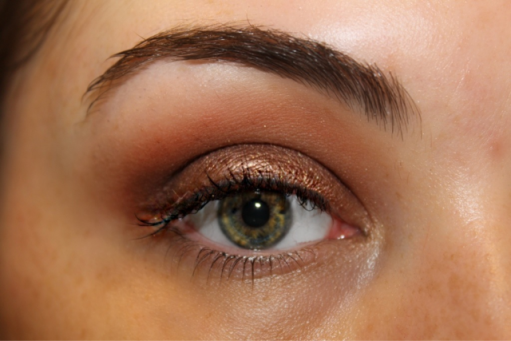
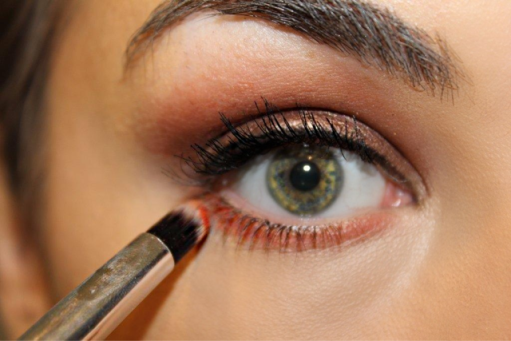
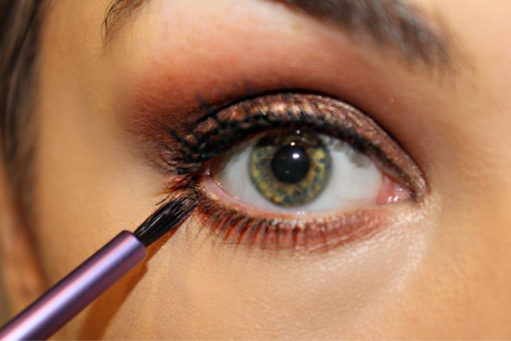
To finish this look I line my lashes using Rimmel’s Glam Eyes Liquid Liner and creating a cat eye effect, together with a few coats my lashes with a few coats of my favourite mascara – Le Volume De Chanel. Apply my foundation (see my earlier post on how I do this here). Line my lower lashline with Bandit using my Sigma E20 Short Shader Brush and coating my bottom lashes with Le Volume De Chanel.


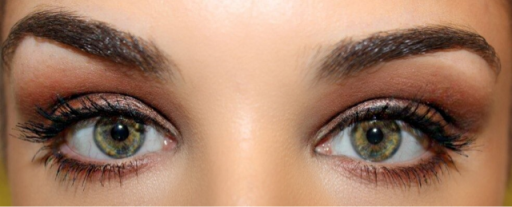
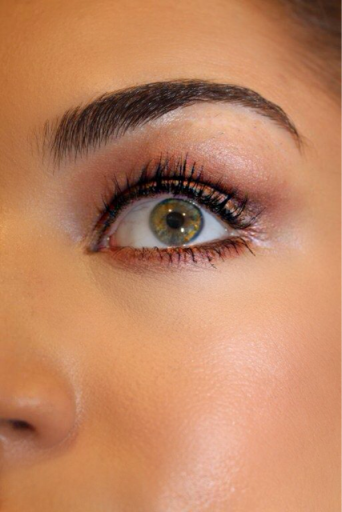
 While its not an overly complicated look, i think it has great impact mainly because of the gorgeous feature shade – I Heart This by ColourPop. So have a look and let me know what you think or if you give this a try at home.
Till next time xoxo

My Foundation Routine!!

HOWDY HO BABES!

I get asked all the time about my foundation routine, so I thought I would do an updated step by step guide of what I do and what works for me. Please note I am aware that this might seem like a lot of makeup for some but I like it so, that’s that! If you would like to see how I achieve this, then read on my loves!

~ PREP AND PRIME ~

For me this is one of the most IMPORTANT steps to having a flawless face and I do this on both myself and all my clients. By doing this it really helps make the makeup last all day and night 🙂 Firstly you need to understand your skin type so know you know how best to prep and prime your skin. For me, my skin is on the dry side so I prep my skin by rehydrating it with my holy grail moisturizer combo of Embryolisse 24 Hour Miracle Cream, and Bobbi Brown’s Hydrating Face Cream. I Let that sink in for about 5 minutes (this is where I usually go and do my eyes, and then come back and finish off my face). To prime my face I apply Hourglass’s Veil Mineral Primer and then apply my favourite illuminizer, MAC’s Strobe Cream.

/home/wpcom/public_html/wp-content/blogs.dir/69d/45502932/files/2015/01/img_8243.jpg

~ FOUNDATION APPLICATION~

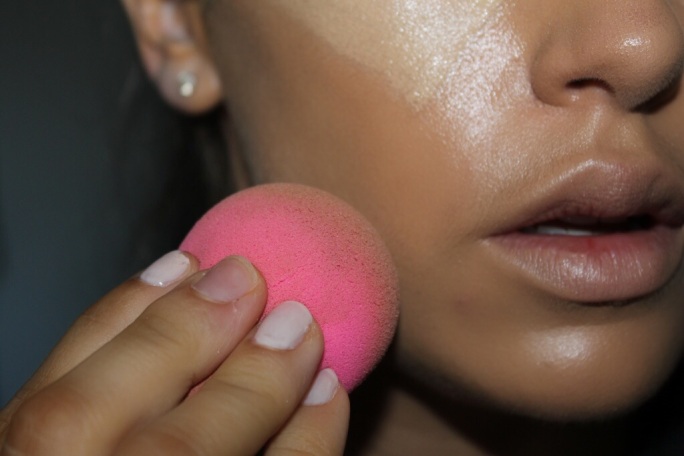
I am a HUGE fan of actually mixing different foundations. It’s rare to find or expect one foundation to give you the exact colour or coverage you want or so, I am always experimenting and trying out different combos. Currently this is the one that I am really digging… Taking my new fave liquid foundation by Make Up Store in the colour Honey (which doesn’t appear to be on their site however, if you contact the store directly then they can make arrangements to ship to you. Click here for the store closest to you) together with EX1 Cosmetics Invisiwear Liquid Foundation in the colour 200 (or 300 if I am more tanned or have some fake tan on). I take two pumps of the Makeup Store foundation and one pump of the EX 1 foundation, mix it together and apply all over my face with my trusty Beauty Blender.

/home/wpcom/public_html/wp-content/blogs.dir/69d/45502932/files/2015/01/img_8244.jpg

/home/wpcom/public_html/wp-content/blogs.dir/69d/45502932/files/2015/01/img_8246.jpg

~ CONCEAL AND HIGHLIGHT ~

To conceal my dark circles I take NARS Radiant Creamy Concealer by NARS in the shade Honey and place this directly under my eyes in a “C”shape. To highlight my face I take the same concealer but in the shade Ginger and place it under where I placed the Honey shade, under my eyes  in an upside down triangle shape. I then take this colour down the bridge of my nose and up to my forehead and a little on my upper lip and chin. To blend this all out I use my Beauty Blender, again 🙂

/home/wpcom/public_html/wp-content/blogs.dir/69d/45502932/files/2015/01/img_8249.jpg

~ SETTING AND CONTOURING ~

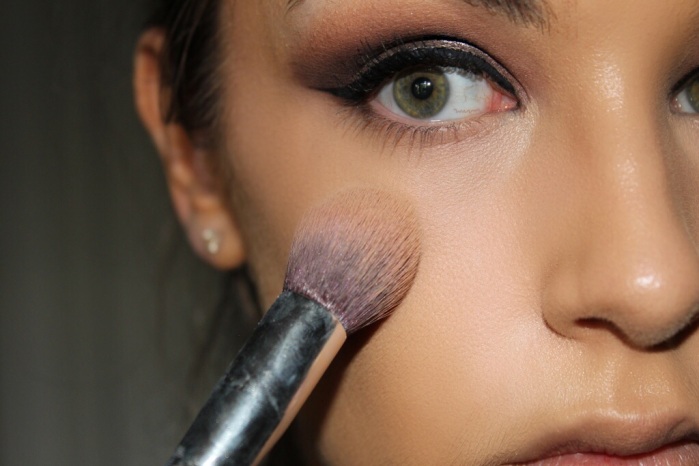
To set my concealer I use The Chisler Brush by Hair and Makeup Addiction with Chanel’s Le Blanc Fresh Glow Loose Brightening Powder. As I am naturally dry I prefer a dewy look so I don’t like to use a lot of powder, so, to set the rest of my face I use another Make Up Store product, their Micronized Compact Powder in Latte (again not on the website so if you want to contact your closest store – click here).  To apply this I use the Blush Brush by Real Techniques and gently pat it over the foundation. To contour and carve out some cheek bones I use the NARS Ita Kabuki Brush and Too Faced Chocolate Soliel Matte Bronzer with my MAC 168 Large Angled Contour Brush.

/home/wpcom/public_html/wp-content/blogs.dir/69d/45502932/files/2015/01/img_8252.jpg

/home/wpcom/public_html/wp-content/blogs.dir/69d/45502932/files/2015/01/img_8251.jpg

/home/wpcom/public_html/wp-content/blogs.dir/69d/45502932/files/2015/01/img_8253.jpg

~ BLUSH, GLOW AND SET ~

For my blush I use MAC’s Mineralize Blush the shade Warm Soul as it’s a mid tone beige colour with gold pearl in it. Tried to find this on the Australian MAC website but for some reason it’s not there, yet I know for a fact that you can buy in store. To apply this is I take a clean MAC 168 Large Angled Contour Brush. To help add a little more glow to my skin I take my Hourglass Ambient Lighting powder in the shade Luminous Light and my Sigma F35 Tapered Highlighter Brush and place it under my eyes where I highlighted earlier with my concealer. I then take The Multitasker by Hair and Makeup Addiction Finishing and Mary-Lou Manizer by The Balm and highlight the bridge of my nose and a little into my forehead. To finish it off and set my face I take MAC’s Fix Plus Spray and spritz my face a few times all over, let that dry – ANNNNNNNND… BAM I’M READY TO GO! Hahaha!

/home/wpcom/public_html/wp-content/blogs.dir/69d/45502932/files/2015/01/img_8254.jpg

/home/wpcom/public_html/wp-content/blogs.dir/69d/45502932/files/2015/01/img_8259.jpg

Ok so there you have it, that is my full faced, every day foundation routine. Pretty easy I think, so hope you like and if you have any questions or comments I would love to hear from you.

Much love, till next time xoxo

Valentines Day Look 4

Firstly Happy Valentines Day my loves!! I hope you’re having a lovely day no matter what you’re doing. Well, here is the fourth and final look in my Valentines Day series. This is my take on a smokey eye… So if you want to see how I do this read onwards xx

~STEP 1~

As this is a strong look with dark colours I definitely don’t want this look to crease so I prime my eyes with Shadow Insurance by Too Faced Cosmetics. Then taking Crème Brûlée by Makeup Geek on my E45 Small Tapered Blending Brush by Sigma I place this just above my crease and blend thoroughly.

20140213-212330.jpg

~STEP 2~

Using the same brush I take Cocoa Bear by Makeup Geek and blend into my crease and upwards into where I placed Crème Brûlée. Blend until the two colours transition smoothly.

20140213-212347.jpg

~STEP 3~

Next I take my Bobbi Brown Long-Wear Eye Pencil in Jet (I am obsessed with this btw – it is the only eyeliner pencil that actually stays put and doesnt smudge underneath my eyes) and roughly line my upper lash line.

20140213-212413.jpg

~STEP 4~

Taking The Shader Brush from my Hair and Makeup Addiction Luxury Set, I blend the liner over my lid. When doing this make sure to NOT blend it into you crease – stop just before the crease. If you take it further you’re going to end up with too much black, you will lose your transition colours and end up looking like a panda or two burnt holes in a blanket

20140213-212428.jpg

~STEP 5~

After I have blended the eyeliner over my lid I take Corrupt by Makeup Geek on the same brush The Shader we used to blend in the eyeliner. To place this on the lid I gently pack it on in patting motions.

20140213-212507.jpg

~STEP 6~

BLEND! This is the key element in making this look work. So I take the same E45 brush we used earlier and take a little more Cocoa Bear and start blending Corrupt and Cocoa Bear together until the two become seamless and transition nicely.

20140213-212522.jpg

~FINISH~

Once I am happy with the blending of the two colours. I apply my fave mascara – Goddess Mascara by Eye of Horus. Then I line my lower lash line with Mocha by Makeup Geek with The Detailer by Makeup and Hair Addiction and add a coat of Goddess Mascara by Eye of Horus. Then to lighten my inner corner a bit I add the colour Nylon by MAC Cosmetics with my finger tip and then applied a nude lip using the shade Shy Girl by MAC Costmetics and TA DAAAAA all finished!

20140214-153702.jpg

20140214-153812.jpg

20140214-154035.jpg

20140214-154055.jpg

So I know this look is a little bold but I hope you like it and if you try it out and like it I would love to hear about it.

Till next time xoxo
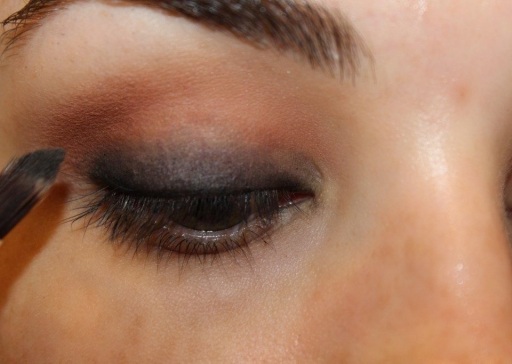
Valentines Day Look – No. 2

Hey Loves,

As I mentioned in my previous post – I would be doing 4 looks, so here is my second look. It’s a bit different and possibly not for everyone, but I find this really makes my eyes pop. So if you’re interested to see how I create this look, read on 🙂

~STEP 1~

So as always I start off my priming my eye with my trusty Shadow Insurance by Too Faced Cosmetics. Then taking the colour Red Brick by MAC Cosmetics on my Sigma E25 Blending brush, I blend this into and well above my crease. I keep blending until the colour becomes a softer shade.

Image

~STEP 2~

To deepen my crease – I take Handwritten by MAC Cosmetics on my Sigma E36 Blending brush and blend that directly into my crease.

Image1

~STEP 3~

For my lid I wanted a nice bronze colour so I chose my favourite shade – Woodwinked (again) by MAC Cosmetics. Taking my Sigma E35 Blending brush I blend that into and all over my lid. I then take the E36 brush I used earlier and go back over my crease to make sure the colour stays strong.

Image2

~STEP 4~

To smoke this look out a bit more I chose to darken my outer V with the shade Espresso by MAC Cosmetics and the same E36 brush used earlier, and concentrate this colour directly into my outer V and taking it a little of the way into my crease but not too far as I want to keep Handwritten the prominent crease colour.

Image5

~STEP 5~

So now that I have the colours all on and blended nicely to how I want them – I then line my upper lash line with Skinny Liquid Eyeliner in black by Eyeko. This time I didn’t take this out for a winged cat eye effect as there is already a lot going on with the colours. Together with a few coats of mascara, lining my upper lashline will give the illusion of much thicker lashes. So from here I just apply my foundation like normal…

Image3

~STEP 6 – optional~

This step is optional. After I applied the my favourite Goddess Mascara by Eye of Horus (which you could do to and then add some to your  bottom lashes and be on your way) – I wanted to make it a bit more intense. So I took my new favourite brush for under eye detailing – aptly named The Detailer by Hair and Makeup Addiction and use Red Brick again – placing it all along my lower lash line ensuring its well blended. Using my Accent Brush from Real Techniques I apply a small amount of Espresso blending it into my lower lashline where I placed Red Brick.

Image6

Image7

~Finish~

To finish off the look I add a few coats of Goddess Mascara by Eye of Horus to my lower lashes and a nude lipstick (the names worn off it :() there you have it… I hope you like it I know it’s a bit different but if I always did the same look you and I would both be bored 🙂

Image12 

Image11

Image9

Image10

Till next time xoxo
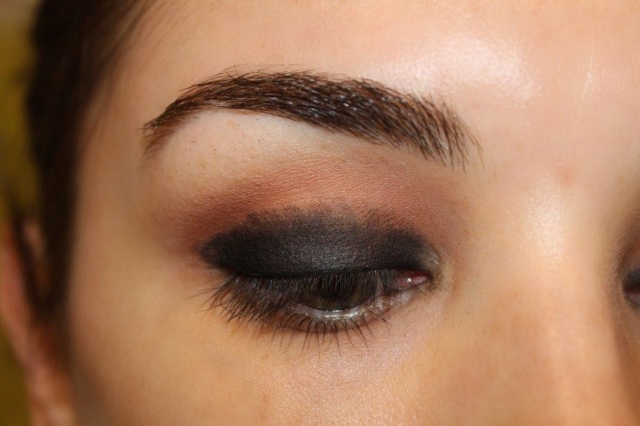
Birthday Makeup

Hey guys, it was my 30th birthday on Monday and rather than sticking with my normal neutrals I wanted to do something a little different. So, I chose to add a strong pop of colour – below is a quick little step by step tutorial on my birthday makeup 🙂

~ STEP 1 ~

ALWAYS Prep and Prime your skin. I like to prime my skin using my favourite moisturizer Embryolisse 24Hr Miracle Cream – while that is sinking in, I then prime my eyes using Too Faced Shadow Insurance ensuring to blend it into my lid and all the way up to my brow bone with a little along my lower lash line.

photo 1

~ STEP 2 ~

Taking Creme Brulee by Makeup Geek I use my E45 brush by Sigma and blend it into and above my crease. This will be my transition colour.

photo 3

~ STEP 3 ~

Using that same brush I take Cocoa Bear by Makeup Geek and blend that into where I placed Creme Brulee – this will help darken up the crease and give me the colour I want. 


photo 2

~ STEP 4 ~

Taking Maybelline’s Colour Tattoo in Painted Purple I use my Hair and Makeup Addiction brush – The Shader – to blend the colour all over my lid  but avoiding to go above the crease.

photo 4

~ STEP 5 ~

Once I had packed on the Colour Tattoo – I then took a purple shimmery shadow from my BH Cosmetics “Eyes on the 60s” palette and packed it on all over my lid with my MAC Cosmetics 239 Eye Shader Brush.


photo 5

~ STEP 6 ~

Here is where I blend, blend, blend, and then blend some more. I wanted to add some depth to this look so taking my E36 blending brush by Sigma (I find this is amazing for precise placement and blending of colour in your crease) and using Mocha by Makeup Geek I added it just in my crease and outer corner. I made sure I blended this thoroughly and then going back to my E45 brush I used earlier to place Creme Brulee and Cocoa Bear I blended those colours up further above my crease. You do not have to do this, it was just a preference of mine as I like to have my colour up higher. The main aim here is the darken the crease and ensure that there are no harsh lines between the crease and the purple lid – you really want it to blend seamlessly.

photo 6

~ STEP 7 ~

Once I was satisfied with the blending of the colours, I then went on to curl my lashes, draw on my liner out into a cat eye flick, then finishing off with Lashings of Mascara. Again this is my personal preference but I like to apply one coat of Maybelline’s Mega Plush mascra then a coat of Maybelline’s Colossal Volume mascara and then go back in with a third and final coat of the Mega Plush.

photo 7

~ FINALE! ~

After apply my foundation, concealer, powder etc. I finish off the look by quickly lining my lower lash line and water line with MAC Cosmetics Eye Khol pencil in Tarnish. I then take my pinky finger and just smudge it out a little. Taking Tarnish I re-line my waterline to darken that up more – and there you have it…

photo 8 photo 9

I hope you liked it – was something to break up my normal routine of neutrals which I tend to lean towards. If you have any questions, thoughts, ideas or requests please don’t hesitate to leave a comment below. I would love to hear from you.

Till next time xoxo