Everyday Sparkle

Hi loves,

It has been forever and a day since I was last on here… Please forgive me – Ive had a lot going on in my life such as moving house, not once but twice, starting a new job, leaving that job and now starting a new one. So… I’ll stop waffling on and get right into my next tutorial…

I dont know about you but I love anything sparkly… So I try to incorporate it into as much of my makeup looks as possible which can be hard in the professional working environment 😉 so see below before a step by step on how to incorpate this into an every day look…

~ STEP 1 ~

You should always prime your eyes, but if you are using a shimmery shadow – you definitely need to prime! For this I turn to my trusty Shadow Insurance by Too Faced Cosmetics, then applying a thin layer of Soft Ochre Paint Pot by MAC Cosmetics – setting it with Blanc Type shadow also by MAC Cosmetics.


~STEP 2~

Taking Soft Brown by MAC Cosmetics and my Sigma E40 Tapered Blending Brush and blend that into and above my crease – this will be my base transition shade.

~STEP 3~

Using the colour Bandit by Colour Pop and my Sigma E35 Tapered Blending Brush I place this directly into the crease – further deepening the colour and getting that rusty brown colour I love.
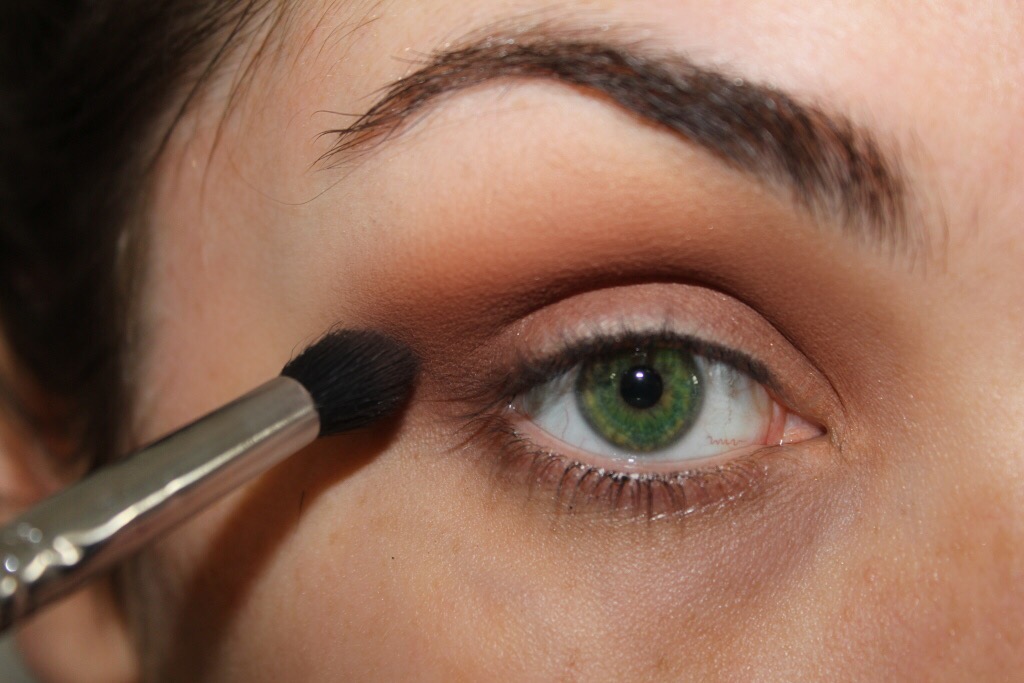
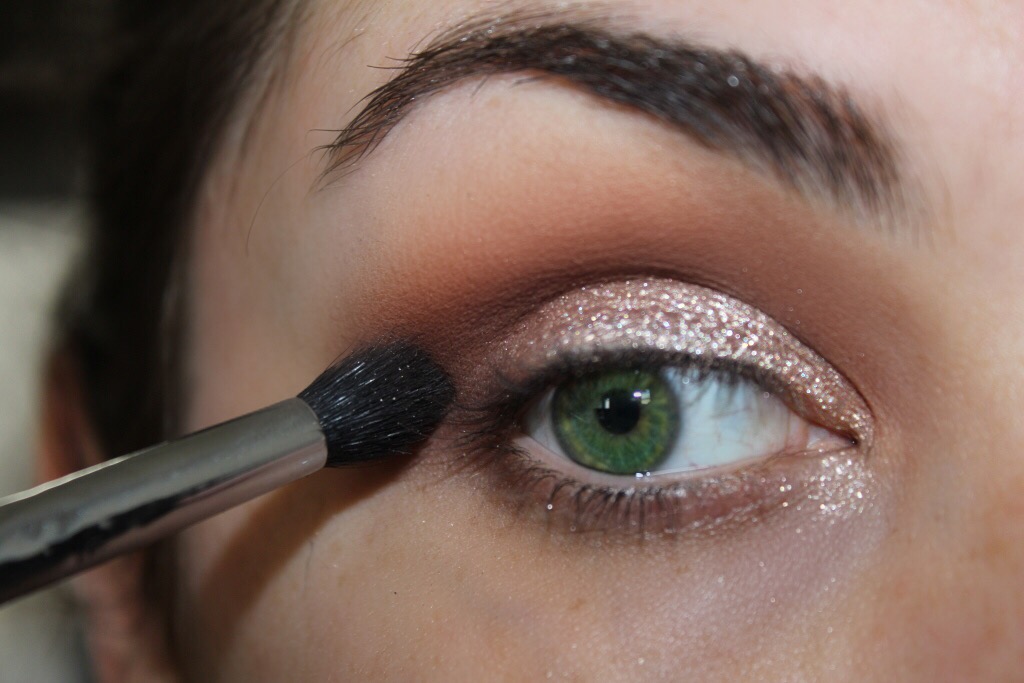
~STEP 4~
To deepen the outer V and crease further and add a slight smokey effect – I take my E45 Small Tapered Blending Brush by Sigma, and the colour Embark by MAC Cosmetics and blend that into the outer V and partly the way into the crease, blending it out till there are no harsh lines.
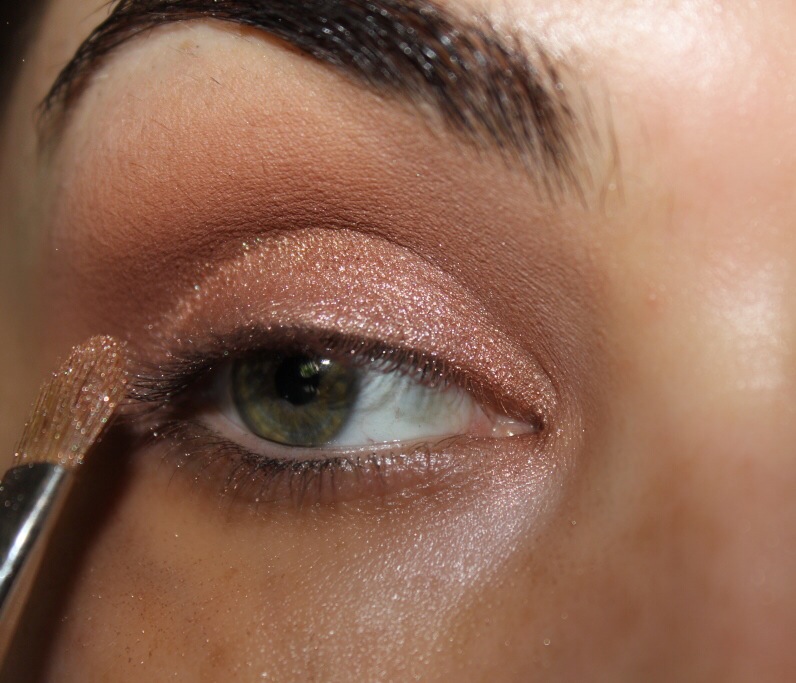
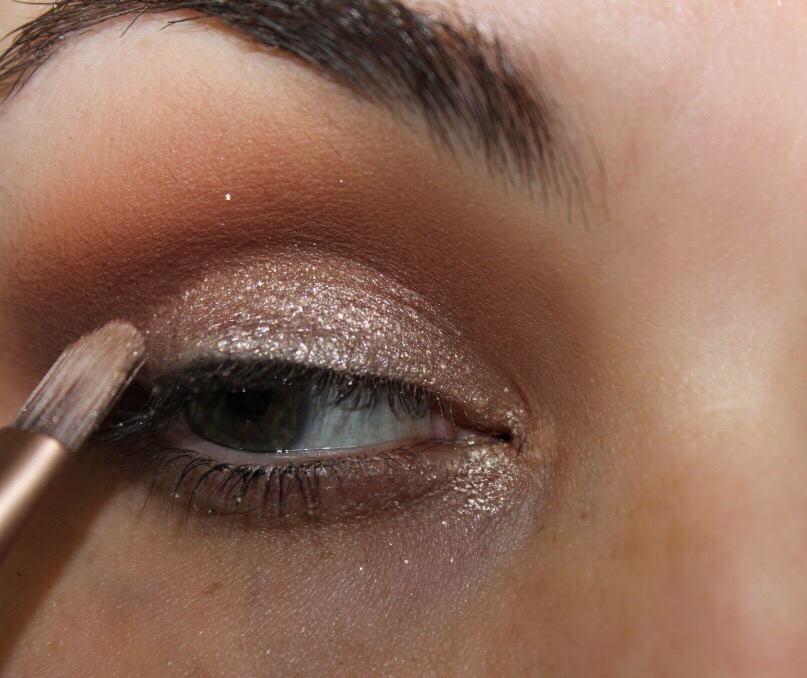

~STEP 5~

Using my new favourite shadow – I Heart This by ColourPop, I first apply this using my fingers and pack it on – then taking a firm brush (I just used the one from my Urban Decay palette) I smooth out the colour I’ve placed on my lid, then taking a bit more on the same bush, I go over the top – to make it a bit more intense. Taking the same E45 Small Tapered Blending Brush I go over the outer V and some of the crease to ensure the smokey dark colour is prominent.


~FINISH~

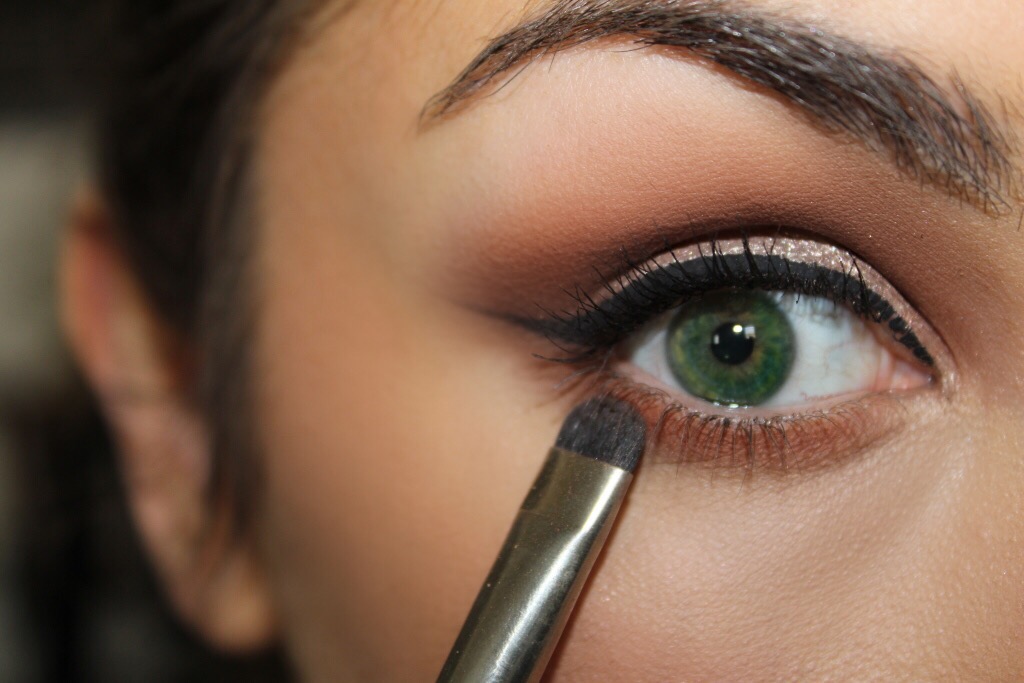
To finish this look I line my lashes using Rimmel’s Glam Eyes Liquid Liner and creating a cat eye effect, together with a few coats my lashes with a few coats of my favourite mascara – Le Volume De Chanel. Apply my foundation (see my earlier post on how I do this here). Line my lower lashline with Bandit using my Sigma E20 Short Shader Brush and coating my bottom lashes with Le Volume De Chanel.


 While its not an overly complicated look, i think it has great impact mainly because of the gorgeous feature shade – I Heart This by ColourPop. So have a look and let me know what you think or if you give this a try at home.
Till next time xoxo

Bronzed Glow like J Lo

HEYA!

So I don’t know about you but I have major girl crush on J Lo (still love calling her that) – how could I not – her style, figure, personality and her flawless face. So if you want to see how I did this – read on…

… E  Y  E  S …

~ STEP 1 ~

First I start off by priming my eyes as always with my Shadow Insurance by Too Faced and then with MAC’s Paint Pot in Soft Ochre. Setting this with a mixture of Beaches and Cream and Peach Smoothie both by Makeup Geek all over my lid and up to my brow bone. Then, taking Soft Brown by MAC on my Sigma E40 Tapered Blending Brush I blend this into my crease and just above as this will be my transition colour.

/home/wpcom/public_html/wp-content/blogs.dir/69d/45502932/files/2015/01/img_8090.jpg

~ STEP 2 ~

To darken up my crease further, I take Texture by MAC on an Sigma E25 Blending Brush and blend that into my crease. Repeating until it is as dark as I want it to be.

/home/wpcom/public_html/wp-content/blogs.dir/69d/45502932/files/2015/01/img_8095.jpg

~ STEP 3 ~

Taking Cocoa Bear by Makeup Geek I apply it to my outer V and blend into my crease with my Sigma E45 Small Tapered Blending Brush and again repeating until it is as dark as I want.

/home/wpcom/public_html/wp-content/blogs.dir/69d/45502932/files/2015/01/img_8097.jpg

~STEP 4~

Taking Tan Pigment by MAC and apply on my lids using my MAC 242 Shader Brush to blend it out till it becomes a nice glow.

/home/wpcom/public_html/wp-content/blogs.dir/69d/45502932/files/2015/01/img_8096.jpg

/home/wpcom/public_html/wp-content/blogs.dir/69d/45502932/files/2015/01/img_8098.jpg

~STEP 5~

Now you could stop here but I wanted to make it a touch darker. So, taking Embark by MAC I apply that to the outer V with my Sigma E45 Small Tapered Blending Brush and blend it directly to my outer V keeping extending it out to help enlarge the eye.

/home/wpcom/public_html/wp-content/blogs.dir/69d/45502932/files/2015/01/img_8099.jpg

~ STEP 6 ~

Here I curl my lashes using my MAC Full Lash Curler and then coat my lashes with a combination of In Extreme Dimension Lash by MAC and Bobbi Brown Smokey Eye Mascara. Let that dry for a few minutes. Again, you could also stop here or you could apply some false lashes. I chose to go ahead and apply No. 43 lashes by MAC wtih DUO Adheasive. While that is drying I apply a light coat of Cocoa Bear by Makeup Geek under my lower lashe line and heavily coat my lower lashes with Bobbi Brown Smokey Eye Mascara and TADAAAA! My eyes are done! Now onto the base…/home/wpcom/public_html/wp-content/blogs.dir/69d/45502932/files/2015/01/img_8100.jpg

/home/wpcom/public_html/wp-content/blogs.dir/69d/45502932/files/2015/01/img_8156.jpg

… F  A  C  E  …

For me this is the REAL feature of this look. I really wanted to emulate J Lo’s bronzed glowing skin. So here is what I did and used to achieve that.

~ STEP 1 ~

As my skin is on the dry side I start by priming my face with Embryolisse 24 Hour Miracle Cream, and Bobbi Brown’s Hydrating Face Cream. I Let that sink in for about 5 minutes and then finish priming my face by applying Hourglass’s Veil Mineral Primer and then apply my favourite illuminizer, MAC’s Strobe Cream.

~ STEP 2 ~

Taking my new favourite liquid foundation by Make Up Store in the colour Honey and mixing in their TO DIE FOR Illuminizer. It doesn’t say what the shade is but as you can see from the pic below it is a bronzed shade and I’m fairly certain its the only one they have. It also doesn’t appear to be on their site however they said that if you contact the store directly then they can make arrangements to ship to you. Click here for the store closes to you. So, taking about 2 pumps of the foundation and a small pump of the illuminizer and mix it together and apply all over my face with my trusty Beauty Blender.

/home/wpcom/public_html/wp-content/blogs.dir/69d/45502932/files/2015/01/img_8155.jpg

~ STEP 3 ~

Taking my holy grail concealer – Radiant Creamy Concealer by NARS in the shade Honey and place this directly under my eyes. Taking the same concealer in the colour Ginger I place this just under my eyes and then taking the same concealer but in the shade Ginger I apply that in an upside down triangle shape under my eyes, down the bridge of my nose and up to my forehead and a little on my chin. Taking my Beauty Blender I blend all that out. To set this I use Chanel’s Le Blanc Fresh Glow Loose Brightening Powder.

~ STEP 4 ~

Taking another Make Up Store product, their Micronized Compact Powder in Latte and set my foundation. I don’t like to use a lot of powder as I am naturally dry and I want this to be a particularly dewy look. So I usually prefer to apply this with a big fluffy face brush and pat that over where it’s needed. To contour my face I use Too Faced Sun Bunny Bronzer with my MAC 168 Large Angled Contour Brush – I like this bronzer for this look as it helps add a further glow and bronzed look to the skin.

~ STEP 5  ~

For my blush I use MAC Mineralize Blush the shade Love Joy as it’s a warm mid tone brown shade with gold pearl in it. I tried to find this on the Australian MAC website but for some reason it’s not there anymore yet I know for a fact that you can buy in in store. Taking my Hourglass Ambient Lighting powder in the shade Luminous Light and my Sigma F35 Tapered Highlighter Brush and place that where I highlighted earlier with my concealer. Finishing off by setting my face using Make Up Store’s Face Mist Spray which can actually double up as a prepping agent for your skin or to set your makeup. Like I mentioned earlier this doesn’t appear on their site but if you check the store locator for the closest one to you they will ship to you.

/home/wpcom/public_html/wp-content/blogs.dir/69d/45502932/files/2015/01/img_7511.jpg

And I’m done!

So, that is my take on J Lo’s bronzed summer glow. What do you think? Let me know, I would love to hear from you…

Till next time xoxo