Bronzed Glow like J Lo

HEYA!

So I don’t know about you but I have major girl crush on J Lo (still love calling her that) – how could I not – her style, figure, personality and her flawless face. So if you want to see how I did this – read on…

… E  Y  E  S …

~ STEP 1 ~

First I start off by priming my eyes as always with my Shadow Insurance by Too Faced and then with MAC’s Paint Pot in Soft Ochre. Setting this with a mixture of Beaches and Cream and Peach Smoothie both by Makeup Geek all over my lid and up to my brow bone. Then, taking Soft Brown by MAC on my Sigma E40 Tapered Blending Brush I blend this into my crease and just above as this will be my transition colour.

/home/wpcom/public_html/wp-content/blogs.dir/69d/45502932/files/2015/01/img_8090.jpg

~ STEP 2 ~

To darken up my crease further, I take Texture by MAC on an Sigma E25 Blending Brush and blend that into my crease. Repeating until it is as dark as I want it to be.

/home/wpcom/public_html/wp-content/blogs.dir/69d/45502932/files/2015/01/img_8095.jpg

~ STEP 3 ~

Taking Cocoa Bear by Makeup Geek I apply it to my outer V and blend into my crease with my Sigma E45 Small Tapered Blending Brush and again repeating until it is as dark as I want.

/home/wpcom/public_html/wp-content/blogs.dir/69d/45502932/files/2015/01/img_8097.jpg

~STEP 4~

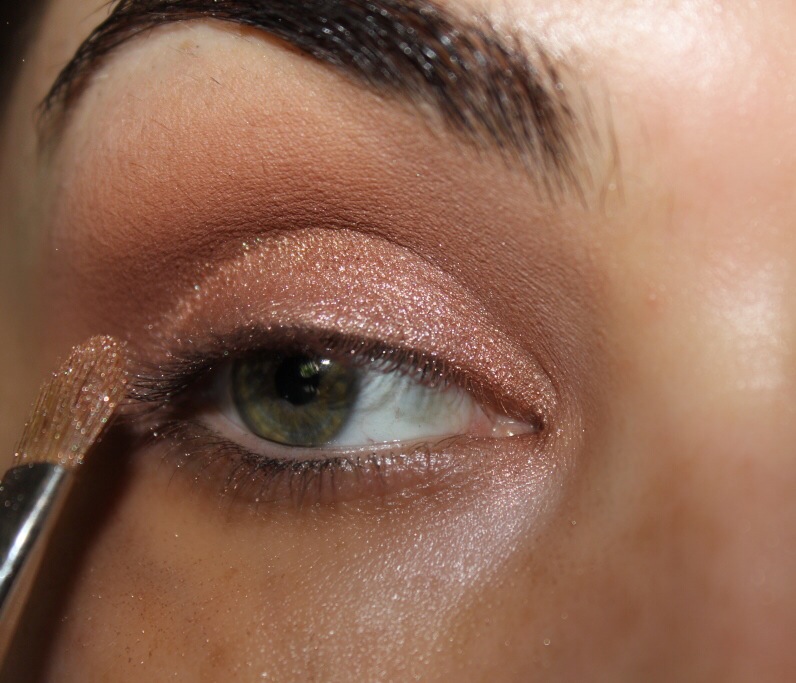
Taking Tan Pigment by MAC and apply on my lids using my MAC 242 Shader Brush to blend it out till it becomes a nice glow.

/home/wpcom/public_html/wp-content/blogs.dir/69d/45502932/files/2015/01/img_8096.jpg

/home/wpcom/public_html/wp-content/blogs.dir/69d/45502932/files/2015/01/img_8098.jpg

~STEP 5~

Now you could stop here but I wanted to make it a touch darker. So, taking Embark by MAC I apply that to the outer V with my Sigma E45 Small Tapered Blending Brush and blend it directly to my outer V keeping extending it out to help enlarge the eye.

/home/wpcom/public_html/wp-content/blogs.dir/69d/45502932/files/2015/01/img_8099.jpg

~ STEP 6 ~

Here I curl my lashes using my MAC Full Lash Curler and then coat my lashes with a combination of In Extreme Dimension Lash by MAC and Bobbi Brown Smokey Eye Mascara. Let that dry for a few minutes. Again, you could also stop here or you could apply some false lashes. I chose to go ahead and apply No. 43 lashes by MAC wtih DUO Adheasive. While that is drying I apply a light coat of Cocoa Bear by Makeup Geek under my lower lashe line and heavily coat my lower lashes with Bobbi Brown Smokey Eye Mascara and TADAAAA! My eyes are done! Now onto the base…/home/wpcom/public_html/wp-content/blogs.dir/69d/45502932/files/2015/01/img_8100.jpg

/home/wpcom/public_html/wp-content/blogs.dir/69d/45502932/files/2015/01/img_8156.jpg

… F  A  C  E  …

For me this is the REAL feature of this look. I really wanted to emulate J Lo’s bronzed glowing skin. So here is what I did and used to achieve that.

~ STEP 1 ~

As my skin is on the dry side I start by priming my face with Embryolisse 24 Hour Miracle Cream, and Bobbi Brown’s Hydrating Face Cream. I Let that sink in for about 5 minutes and then finish priming my face by applying Hourglass’s Veil Mineral Primer and then apply my favourite illuminizer, MAC’s Strobe Cream.

~ STEP 2 ~

Taking my new favourite liquid foundation by Make Up Store in the colour Honey and mixing in their TO DIE FOR Illuminizer. It doesn’t say what the shade is but as you can see from the pic below it is a bronzed shade and I’m fairly certain its the only one they have. It also doesn’t appear to be on their site however they said that if you contact the store directly then they can make arrangements to ship to you. Click here for the store closes to you. So, taking about 2 pumps of the foundation and a small pump of the illuminizer and mix it together and apply all over my face with my trusty Beauty Blender.

/home/wpcom/public_html/wp-content/blogs.dir/69d/45502932/files/2015/01/img_8155.jpg

~ STEP 3 ~

Taking my holy grail concealer – Radiant Creamy Concealer by NARS in the shade Honey and place this directly under my eyes. Taking the same concealer in the colour Ginger I place this just under my eyes and then taking the same concealer but in the shade Ginger I apply that in an upside down triangle shape under my eyes, down the bridge of my nose and up to my forehead and a little on my chin. Taking my Beauty Blender I blend all that out. To set this I use Chanel’s Le Blanc Fresh Glow Loose Brightening Powder.

~ STEP 4 ~

Taking another Make Up Store product, their Micronized Compact Powder in Latte and set my foundation. I don’t like to use a lot of powder as I am naturally dry and I want this to be a particularly dewy look. So I usually prefer to apply this with a big fluffy face brush and pat that over where it’s needed. To contour my face I use Too Faced Sun Bunny Bronzer with my MAC 168 Large Angled Contour Brush – I like this bronzer for this look as it helps add a further glow and bronzed look to the skin.

~ STEP 5  ~

For my blush I use MAC Mineralize Blush the shade Love Joy as it’s a warm mid tone brown shade with gold pearl in it. I tried to find this on the Australian MAC website but for some reason it’s not there anymore yet I know for a fact that you can buy in in store. Taking my Hourglass Ambient Lighting powder in the shade Luminous Light and my Sigma F35 Tapered Highlighter Brush and place that where I highlighted earlier with my concealer. Finishing off by setting my face using Make Up Store’s Face Mist Spray which can actually double up as a prepping agent for your skin or to set your makeup. Like I mentioned earlier this doesn’t appear on their site but if you check the store locator for the closest one to you they will ship to you.

/home/wpcom/public_html/wp-content/blogs.dir/69d/45502932/files/2015/01/img_7511.jpg

And I’m done!

So, that is my take on J Lo’s bronzed summer glow. What do you think? Let me know, I would love to hear from you…

Till next time xoxo


Tis the season to be jolly…

Hey my loves!

I know its been a while since I last posted but there has been a lot happening – I moved house, left my job and am currently deciding on what exactly my future holds for me – career wise. So yes, the head has been a little full of other less creative things. However, someone who I care about mentioned to me he hadn’t seen me post much lately about my makeup business or anything on my blog and that in fact miss seeing me be excited about it – and you know what? I agreed 100%. So having that one simple conversation really revved my creative juices up and… I’m back baby! OH YEAH!

So here we go… As we all know its coming up to the “silly season” where we are all getting invitations thrown at us left right and centre. I know we all have our go to looks, but in my opinion now is the time to try adding a pop of colour you might not have worn before, slapping on a bold lip – or dare I say it… adding some glitter? Just promise me you wont do all three 😉 Over the next couple of weeks I’ll post various different looks and hopefully you can get some inspiration from them and replicate it or make it your own.

I was recently given (very generously) as a farewell present from my old work, one set from the Objects of Affection Holiday Collection by MAC Cosmetics. It is the Silver + Blue + Pigments + Glitter colours. So using one of my new pigments from this range in combination with some other MAC eyeshadow’s… here is the look I came up with. This is perfect for any night-time event/Xmas party.

~ STEP 1 ~

As aways we prime the eye… I am using a combination of Too Faced Shadow Insurance with MAC’s Paintpot in Painterly over the top. This combination is my go to for me AND all my clients. The Shadow Insurance helps prevent that nasty creasing you get if, like me, you have hooded eyes and Painterly helps block out any veins you might see on your lid and gives you a clean canvas to work with. Next taking a big fluffy blending brush, I like to use my Sigma E40 Tapered Blending Brush and I take a mixture of Peach Smoothie and Beaches and Cream by Makeup Geek and blend that all over my lid and up to my brow bone.

IMG_7477.JPG

~ STEP 2 ~

Taking my Sigma E25 Blending Brush and a mixture of the shades Creme Brulee by Makeup Geek and Bamboo by MAC I place it directly into my crease blending upwards (until it is seemless) as this will be our transition shade.

IMG_7478.JPG

~ STEP 3 ~

To darken my crease, and add some dimension I take the shade Handwritten by MAC and my Sigma E45 Small Tapered Blending Brush and place this directly into my crease and blending till there are no harsh lines. By placing a dark shade here and bending into the earlier placed colours it will make the transition of the dark colour we are going to use next much easier.

IMG_7479.JPG

~ STEP 4 ~

Now, here is my favourite part… the pigment. As I mentioned earlier I got some new pigments from the Holiday Collection, so from that set I am taking the colour Deep Blue Green. The photos do not do this colour justice. It reminds me of MAC’s Blue Brown Pigment, in that it isn’t just one shade, in different lights it look quite green, or blue or beautiful mixture of both. Anyway, here I used my Sigma F70 Concealer Brush to pack it on strong all over my lid in small patting motions so as to keep the colour intense rather than blending it out. Make sure you don’t take this colour up into the crease as we want to keep the transition of colours we placed earlier smooth and visible otherwise you will simply look like Uncle Fester.

IMG_7480.JPG

~ STEP 5 ~

Then taking that same E45 Small Tapered Blending Brush simply blend the crease shade and the top of where the pigment was place and the two will blend together seemlessly. Now you need to curl your lashes (or not if you don’t want to) and apply your mascara. Here i am actually using a combination of MAC’s Extreme Dimension Lash in Black Extreme and Bobbi Brown’s Smokey Eye Mascara in Black.

IMG_7543.JPG

~ STEP 6 ~

After I’ve applied my foundation and the rest of my face makeup I take my MAC 214 Short Shader Brush and apply Cocoa Bear by Makeup Geek along my lower lash line – using a clean MAC 239 Eye Shader Brush to blend it out.  Taking Deep Blue Green Pigment again and my Liner brush by Hair and Makeup Addiction I use my Fix Plus spray to help intensify the colour and carefully line right underneath my lower lash line.

IMG_7544.JPG

~ STEP 7 ~

To brighten up my inner corner I use another pigment from the collection called White. I apply this with my Detailer brush (from the Special Eyes Kit) by Hair and Makeup Addiction and place it directly in the inner corners of my eyes blending it out using my Sigma E36 Blending Brush.

IMG_7545.JPG

~ TO FINISH ~

I applied a generous coat of mascara to my bottom lashes and hey presto, you’re ready to go and show off those peepers… You could always add some falsies if you wanted too but I don’t like to wear them too much.

IMG_7472.JPG

IMG_7473.JPG

So tell me, what did you think of this look? Would you be game to show this off at your next Holiday party?

Till next time

xoxo

A Little Party Never Killed Nobody… Part 1

  party

So it was my gorgeous friend Ellie’s hens party this Saturday just gone, and her best friend, now also now a dear friend of mine, planned the whole thing herself and it was awesome – so much fun was had by all. The theme was Great Gatsby/1920’s Flapper and all the girls that went really got into it which was great – some went the traditional route, but not me… I chose to put my own spin on it – naturally 😉 So if you’ve been invited to go to one of these type of themed parties and are looking for something a little different and “non-traditional” then read on to see what I came up.

~ MAKEUP ~

The roaring ’20s were both extremely racy and dramatic. With harsh make-up and short bobbed hair, the ladies of the 1920s were set to make an immense impression upon the world, and upon the history of beauty. According to my research (thank you Google ;)) Make-up was scarce during WWI, but the end of the war and the economic boom of many western countries, resulted in a decadent decade of dressing up, dancing and partying. So I perused some different options and came up with the following inspiration of both modern and traditional:

20140804-112142-40902343.jpg

As you can see the women of the 1920’s embraced the bold eye and bold lip and paired them together. So if you’re interested to see what i came up with and how I did it… READ ON 🙂

~ STEP 1 ~

As I am going to be using bold shades and i want them to last without creasing i am going to need a strong eyeshadow primer/base that also acts as a blank canvas. Here I am using Urban Decay’s Eyeshadow Primer Potion in Eden. I take a small amount (which goes a long way with this product) and place that all over my lid using my Sigma  P80 brush and blend that all over my lid and up to my brow bone. Taking a neutral shade, I blend that all over my lid and up to my brow bone – I used Blanc Type by MAC Cosmetics – This just sets the primer and will make it easier to blend the dark shades I plan to use.

20140804-105527-39327910.jpg

20140804-105528-39328072.jpg

~ STEP 2 ~

I take a warm neutral shade, for my transition colour and place that above my crease – blending it back and forth in a windscreen wiper motions (I chose to go with a mixture of Beaches and Cream with Creme Brûlée both by Makeup Geek). Next I take the light baby pink shade from my Eyes on the 60s palette by BH Cosmetics and using my go to blending brushe, E35 Tapered Blending brush by Sigma and blend that just beneath where I placed my transition shade – using windscreen wiper motions to blend it out thoroughly. As this was to be a very dramatic look I went back in a few times and added more of the baby pink colour till I was happy with the intensity of it.

20140804-112513-41113964.jpg

baby pink_eyesonthe60s

20140804-112514-41114114.jpg

~ STEP 3 ~

To further intensify this look I chose to go for a red shade, yes I said RED! LOL!  Taking my Crease Brush by Hair and Makeup Addiction and the red shade from the same Eyes on the 60s palette and place that directly into my crease blending it upwards and smoothly into my transition shade. I keep adding to it until I am happy with the intensity of it.

red_eyesonthe60s

20140804-144951-53391207.jpg

~ STEP 4 ~

After I am happy with the placement of the red shade, I take my NYX Jumbo Pencil in Gold and place that all over my lid, being careful to not take that into my crease. After that I blend out the colour with my finger till it is nice and smooth.

20140804-145041-53441957.jpg

~ STEP 5 ~

Taking a mixture of the light warm brown and the darker brown from the Eyes on the 60s palette I place that over the top of where I put the Gold Jumbo Eye Pencil. I then blend that out and redefine my crease with a clean E45 Small Tapered Blending brush by Sigma. I also take more of the darker shade and concentrate that in my outer V.

browns_eyesonthe60s

20140804-150512-54312408.jpg

20140804-150545-54345376.jpg

~ STEP 6 ~

Next I take Utopia by Makeup Geek (this pigment is AMAZING) and pack it on with my finger – once I am satisfied, I take my Eye Pencil in Black Moon by NARS and line my upper lash line and then smudge it out with my E65 Small Angle brush by Sigma till it has a more smoked out less harsh look. Before I clean up and finish off the look, I got over my transition colour to make sure the red stands out nicely. I also add a bit more of Utopia as I want it really sparkly.

20140804-160820-58100228.jpg

20140804-160820-58100392.jpg

~ FINALE ~

Taking a baby wipe I remove all the fall out from my shadows and pigment – making sure the area is nice and clean ready for foundation. Here I complete my look by curling my lashes using my favourite lash curler by MAC Cosmetics and then apply a couple of coats of Smokey Eye Mascara by Bobbi Brown and Le Volume de Chanel Mascara. Once that has set, I then apply my false lashes (I told you this was an intense look!). The ones I chose are called Girl, You Craazy! by Velour Lashes. I love this brand… you can honestly wear them (provided you take care of them) at least 20 times before having to get a new pair. I actually stop and ask me where I’d got them from. Once they are on and all set, I then take some of the red shade mixed with the dark brown shade from the Eyes on the 60s palette and blend that under my lower lash line with my E21 Small Smudge brush by Sigma and really smoke it out. I apply some the Smokey Eye Mascara by Bobbi Brown on my lower lashes and line my water line with the same Black Moon Eye Pencil by NARS and there you have it! The eyes are done! I then of course applied all my foundation and blush etc. I have also created a little video if you want to check that out also – its fairly basic but you at least you can get an idea of what I’ve been talking about in the steps above…

20140804-161353-58433827.jpg

20140804-161354-58434138.jpg

20140804-161353-58433982.jpg

So I hope you enjoyed this very different and somewhat intense look. I did actually choose to pair this with the Rebel Lipstick by MAC Cosmetics but I forgot to photograph it… SILLY ME! Would love to hear what you think … Next post will be on my hair and how I styled it for this look.

Till next time XOXO

Smoke and Glitter

Today’s tutorial is on a look I came up with that can go from day to night, and has a slight smoked out effect. I feel this will fast become one of my go to day to night smokey looks. It definitely makes blue and green eyes pop! So if you’d like to see how I completed this look READ ON!

~ COLOURS USED ~

Todays look I’ve used all shadows by Makeup Geek and a pressed pigment by MAC Cosmetics called Day Gleam.

20140611-101003-36603928.jpg

20140611-123353-45233688.jpg

~ STEP 1 ~

As always, I start off by priming my eyes with my trusty Shadow Insurance by Too Faced. Then taking the colour Beaches & Cream I using my big fluffy blending brush (E35) I blend that into my crease and all over my lid and all the way up to my brow bone. Taking more of that same colour I concentrate it into the crease and keep blending till I am happy with the colour.

20140611-102240-37360407.jpg

~ STEP 2 ~

Taking the colour Nearly Naked I use a slightly less fluffy blending brush (E25) for more precise shadow placement, and blend that out into my crease and just above. I go in a few times to darken and smoke out the colour more.

20140611-104358-38638820.jpg

~ STEP 3 ~

As I want to really help make my eyes pop, I take the colour Cocoa Bear to deepen the crease further. Using the same brush I used before, I blend the colour out into my crease and onto my inner corner and outer V. With this step, you want to make sure you keep the centre of the lid free of colour – for now…

20140611-110042-39642455.jpg

~ STEP 4 ~

Taking a more precise blending brush (E45) I blend the all the colours together so there are no harsh lines or edges.  this helps to also keep the centre of the lid shadow free.

20140611-112518-41118323.jpg

~ STEP 5 ~

Taking the pressed pigment Day Gleam by MAC Cosmetics, I take my ring finger and lightly swirl it around picking up the colour with my finger and pressing it into the Centre of my lid.

20140611-112625-41185154.jpg

~ STEP 6 ~

Then taking a small crease blending brush (E47) I take the colour Mocha and darken up just the outer V and bring that into just my crease and blend it out. This will help to smoke out the look whilst adding some depth to it as well.

20140611-112659-41219994.jpg

~ STEP 7 ~

I go over the crease again with my big fluffy blending brush and go over the crease and ensure there are no harsh lines. As I want this look to be really smokey I decide not to use a liquid liner but rather an eye pencil (Long-Wear Eye Pencil in Mahogany by Bobbi Brown) and smudge it out using The Liner brush by Hair and Makeup Addiction.  I also decide to take more of Day Gleam and place it into the centre of my lid and right into my inner corner.

20140611-115945-43185036.jpg

~ STEP 8 ~

I curl my lashes with MAC Cosmetics Full Lash Curler and then apply a couple of coats of Smokey Eye Mascara by Bobbi brown (am really loving this at the moment) and finish off my under eye by taking the same eye pencil I used earlier and smudging it with the same liner brush under my whole waterline and then lining my waterline with it. Going over the top of the liner with the colour Cocoa Bear and coating my lower lashes with the same Smokey Eye Mascara.

20140611-120102-43262727.jpg

FINISHED …

So here you have the finished look. You chould choose to add false lashes if you wish but I just chose to go au natural-ish and just stick with mascara.

20140611-122045-44445367.jpg

20140611-122117-44477550.jpg

20140611-122255-44575140.jpg

Hope you like this one – let me know what you think or if you try it for yourself…

Till next time XOXO