Tis the season to be jolly…

Hey my loves!

I know its been a while since I last posted but there has been a lot happening – I moved house, left my job and am currently deciding on what exactly my future holds for me – career wise. So yes, the head has been a little full of other less creative things. However, someone who I care about mentioned to me he hadn’t seen me post much lately about my makeup business or anything on my blog and that in fact miss seeing me be excited about it – and you know what? I agreed 100%. So having that one simple conversation really revved my creative juices up and… I’m back baby! OH YEAH!

So here we go… As we all know its coming up to the “silly season” where we are all getting invitations thrown at us left right and centre. I know we all have our go to looks, but in my opinion now is the time to try adding a pop of colour you might not have worn before, slapping on a bold lip – or dare I say it… adding some glitter? Just promise me you wont do all three 😉 Over the next couple of weeks I’ll post various different looks and hopefully you can get some inspiration from them and replicate it or make it your own.

I was recently given (very generously) as a farewell present from my old work, one set from the Objects of Affection Holiday Collection by MAC Cosmetics. It is the Silver + Blue + Pigments + Glitter colours. So using one of my new pigments from this range in combination with some other MAC eyeshadow’s… here is the look I came up with. This is perfect for any night-time event/Xmas party.

~ STEP 1 ~

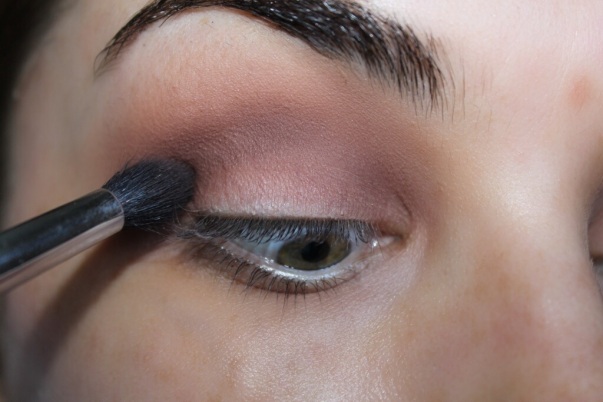
As aways we prime the eye… I am using a combination of Too Faced Shadow Insurance with MAC’s Paintpot in Painterly over the top. This combination is my go to for me AND all my clients. The Shadow Insurance helps prevent that nasty creasing you get if, like me, you have hooded eyes and Painterly helps block out any veins you might see on your lid and gives you a clean canvas to work with. Next taking a big fluffy blending brush, I like to use my Sigma E40 Tapered Blending Brush and I take a mixture of Peach Smoothie and Beaches and Cream by Makeup Geek and blend that all over my lid and up to my brow bone.

IMG_7477.JPG

~ STEP 2 ~

Taking my Sigma E25 Blending Brush and a mixture of the shades Creme Brulee by Makeup Geek and Bamboo by MAC I place it directly into my crease blending upwards (until it is seemless) as this will be our transition shade.

IMG_7478.JPG

~ STEP 3 ~

To darken my crease, and add some dimension I take the shade Handwritten by MAC and my Sigma E45 Small Tapered Blending Brush and place this directly into my crease and blending till there are no harsh lines. By placing a dark shade here and bending into the earlier placed colours it will make the transition of the dark colour we are going to use next much easier.

IMG_7479.JPG

~ STEP 4 ~

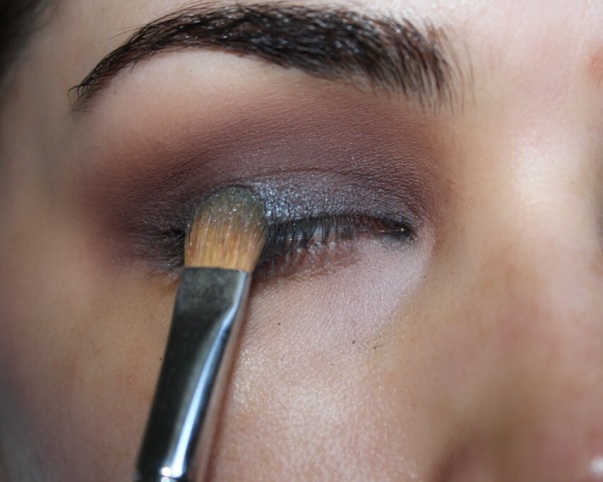
Now, here is my favourite part… the pigment. As I mentioned earlier I got some new pigments from the Holiday Collection, so from that set I am taking the colour Deep Blue Green. The photos do not do this colour justice. It reminds me of MAC’s Blue Brown Pigment, in that it isn’t just one shade, in different lights it look quite green, or blue or beautiful mixture of both. Anyway, here I used my Sigma F70 Concealer Brush to pack it on strong all over my lid in small patting motions so as to keep the colour intense rather than blending it out. Make sure you don’t take this colour up into the crease as we want to keep the transition of colours we placed earlier smooth and visible otherwise you will simply look like Uncle Fester.

IMG_7480.JPG

~ STEP 5 ~

Then taking that same E45 Small Tapered Blending Brush simply blend the crease shade and the top of where the pigment was place and the two will blend together seemlessly. Now you need to curl your lashes (or not if you don’t want to) and apply your mascara. Here i am actually using a combination of MAC’s Extreme Dimension Lash in Black Extreme and Bobbi Brown’s Smokey Eye Mascara in Black.

IMG_7543.JPG

~ STEP 6 ~

After I’ve applied my foundation and the rest of my face makeup I take my MAC 214 Short Shader Brush and apply Cocoa Bear by Makeup Geek along my lower lash line – using a clean MAC 239 Eye Shader Brush to blend it out.  Taking Deep Blue Green Pigment again and my Liner brush by Hair and Makeup Addiction I use my Fix Plus spray to help intensify the colour and carefully line right underneath my lower lash line.

IMG_7544.JPG

~ STEP 7 ~

To brighten up my inner corner I use another pigment from the collection called White. I apply this with my Detailer brush (from the Special Eyes Kit) by Hair and Makeup Addiction and place it directly in the inner corners of my eyes blending it out using my Sigma E36 Blending Brush.

IMG_7545.JPG

~ TO FINISH ~

I applied a generous coat of mascara to my bottom lashes and hey presto, you’re ready to go and show off those peepers… You could always add some falsies if you wanted too but I don’t like to wear them too much.

IMG_7472.JPG

IMG_7473.JPG

So tell me, what did you think of this look? Would you be game to show this off at your next Holiday party?

Till next time

xoxo

Smoked Out Plum

Hey my loves!

Here is the tutorial from a look I posted on my instagram about a week ago (sorry its a bit late). Summer is on its way for us in Australia and while this might seem like more of a fall type look I believe you can wear it in summer and/or winter. I don’t know about you by for me personally I dont really like to let the season determine what makeup I wear or don’t wear.

So I hope you like this, and read on for more details…

~ STEP 1 ~

As always, I start off by priming my eyes with my trusty Shadow Insurance by Too Faced. Taking MAC Cosmetics Paint Pot in Painterly I apply that on my lid and blending up to my brown bone. Then taking Salted Caramel from the Chocolate Bar Palette by Too Faced and mixing it with a touch of Red Brick by MAC Cosmetics I blend that into and just above my crease – this will be my transition shade and really help to blend and smoke out the darker colour.

image

~ STEP 2 ~

Taking Sketch by MAC Cosmetics I use a small flat shader brush to really pack that colour onto my lid and up into my crease. I go over this a few times to really intensify the colour.

image

~ STEP 3 ~

Taking a small tapered blending brush I take my transition shade combination and place that directly into the crease to help smoke out my crease line and making it seamless. I then go back in with Sketch and make the lid more intense.

image~ STEP 4 ~

Going over my crease and transition shades with a big fluffy brush I make sure that all lines are blended out smoothly.

image

~ STEP 5 ~

Taking a small concealer brush I take the pigment Utopia by Makeup Geek and apply it wet (I used MAC Cosmetics Fix Plus Spray) and carefully place it directly into the centre of my lid. I softly blend out the edges into the shadow. This gives the lid a glowing effect.

image

~ STEP 6 ~

As this is a slightly smokey look I don’t want to apply any liner – I will however, be applying some false lashes. For this look I’ve shown you two options:

  1. Flutter Lashes in Chantelle (one of my all time favourite styles)
  2. Ardell Lashes in no. 120 Demi Wispies (love how these flair out at the ends)
image

Ardell 120 Wispies

Once they are on and the glue is dried… I then apply my foundation, powder, contour etc.

To finish off the look I line my lower lash line with Salted Caramel from the Chocolate Bar Palette by Too Faced and mixing it with a touch of Red Brick by MAC Cosmetics. Taking a small detail brush I apply a touch of sketch really close to my lashline to help make this a really smokey look… And there you have it! ALL DONE!

image

Flutter Lashes – Chantelle

image

Flutter Lashes – Chantelle

So what do you think? Would you like to see more looks like this?  I hope you’ll stay tuned for some HALLOWEEN LOOKS!

Thanks for stopping by and if you create this look – be sure to load it on instagram and use the hashtag – #makeupbykrystleg

Till next time loves xoxo

I LOVE GLITTER

HELLO MY LOVELIES!

I don’t know about you but this beautiful warm weather we are having has me all excited to create new spring summer looks with soft dewy skin. I love at this time of year to create looks that have minimal effort but maximum impact. Personally I like to embrace the warmer colours and keep it as natural as possible. One thing I do love to add is glitter/shimmer/pigments to my eyes to add for an easy way to jazz up a simple spring time to summer look. So read on for how I go about adding glitter to my eyes…

~ STEP 1 ~

Priming the eye is essential to help the eyeshadow colour you use to have something to hold onto. Here I chose to go with one of my two holy grail MAC primers – M.A.C’s Paint Pot in the colour Painterly and placed that all over my lid and up to my brow bone using my Sigma P80 brush.

primer

~ STEP 2 ~

Applying M.A.C’s eyeshadow in colour Jest all over my lid and Blanc Type underneath my brow with my Sigma E55 brush. Blending both out till they are seamless and blended without any harsh lines.

jest

 ~ STEP 3 ~

The taking my E45 brush by Sigma I blended M.A.C’s Cork and Haux into my crease and blended well and repeated until it was a dark as I wanted.

crease


~ STEP 4 ~

Here is where it can get a little fiddly… We want to apply the glitter and to ensure it stay on and doesn’t fall out as the day/night progresses, I then apply a small amount of lash glue over the top of my lid with my finger. Then, taking my M.A.C 242 brush I take some of the glitter (I used Glitter – White (Green Undertone by Bitch Slap Cosmetics) and pat it quickly across where I put the lash glue.

My advice is to tap out a little of the glitter you want to use on a tissue so you can dab it easily and reduces the mess made by accidental spilling of glitter containers or getting any glue into your container. Do one eye at a time and keep your eye closed until the glue and glitter are set. Then repeat on the other eye.

glitter


~ STEP 5 ~

Finish the look off by adding liner to the top lid if you want, it’s a personal preference really but personally I like it with liquid liner as I feel it finishes the eye off nicely and makes it look a little more dramatic gives it a sharper edge. Then coat the lashes with some mascara – as little or as much as you like – and if you want to add further flair you can apply a pair of false lashes. For my finished look I went with both – I used Rimmel’s Glam Eyes Professional Liquid Liner in black and topped it off with a coat of mascara and Lashes in a Box style no. 2

close up glitter eye

close up glitter eye 2


close up glitter eye 3.1


Thank you for reading and I would love to hear from you so if you have any comments, tips, advice, questions or anything please leave me a comment below – I would love to hear from you 🙂

Till next time xox

on a bad day


Cutting the Crease

Hey my loves!

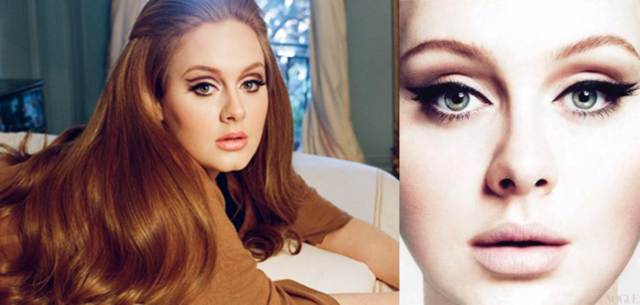
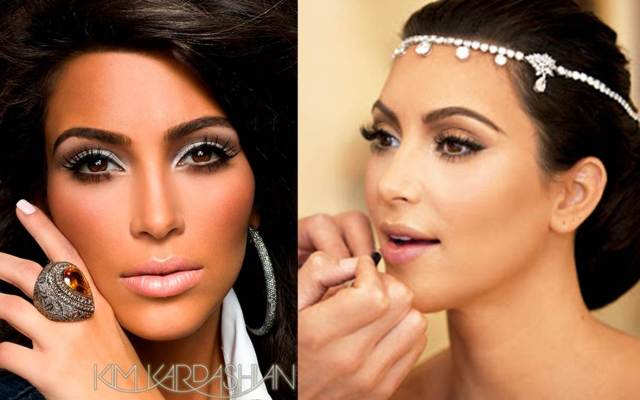
When you think of cutting the crease – what celebrities spring to mind? For it would have to be Adele and Kim Kardashian –  as you can see below both Adele and Kim K nail it (or rather their makeup artists do ;)) – ranging from the dramatic to the soft.

adele

 kim k cut crease

Cutting your crease helps to really open up your eye and make it pop – personally this is my go to look for every day as I love how it makes my eyes appear bigger than they normally are. There are many ways to wear this look – for me I usually go more subtle. So I did a quick and easy tutorial for you – check it out and let me know what you think

~ Step 1 ~

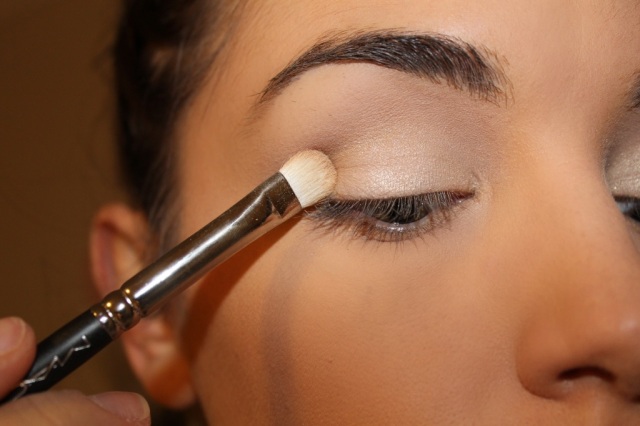
Firstly I like to prime my eye using MAC’s paint pot in Painterly applying it with my Sigma P80 precision flat brush all over my lid and blending it up to my brow bone

prime

~ Step 2 ~

Then taking my MAC 239 brush eye shader brush, I use a combination of MAC’s Ricepaper and Retrospeck  and apply that all over my lid.

lid

~ Step 3 ~

Here is where I start to define my crease  – for this I use one of  favourite brushes by Sigma – the E45 small tapered blending brush. I find this brush is PERFECT for applying colors to the crease. The first colour I am adding to the crease is MAC’s Cork – using my E45 brush I apply it into my crease blending it out softly, using a windscreen wiper motion. Then repeating the same process but using MAC’s Quarry over the top. You should now have a nice light brown cut crease appearing. Depending on how comfortable you are you might decide to stop here and apply your liner and mascara – or you can follow my other steps for a more defined cut crease. 

crease 1

~ Step 4 ~

Taking the same E45 brush by Sigma I apply Oktoberfest – from my Coastal Scents 252 Ultimate Palette – and repeat the same cut crease motion as in Step 3 – but as you will see the crease darkens to a lovely rich brown.

crease 2

~ Step 4 ~

Again you could choose to finish it up here and it would still look lovely, however for me I wanted to add a pop to this crease so I chose to take Vibrant Red from the same Coastal Scents Palette  – and by adding that into the crease and blending with my E45 brush by Sigma, very thoroughly out into and just over the crease I get the colour effect I am after – a light red-brown combination which I believe helps make my eyes stand out (please excuse the uncombed brows).crease complete

~ Step 5 ~

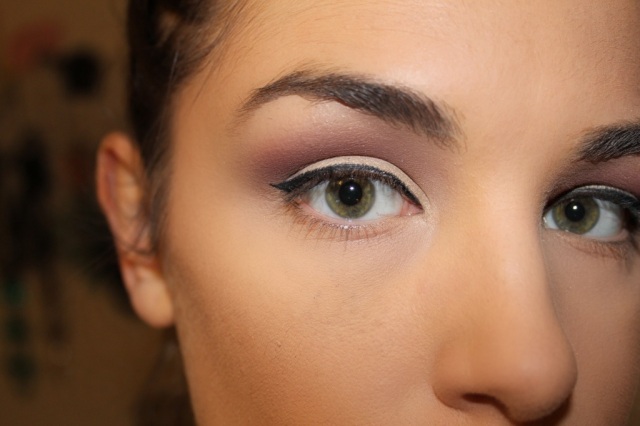
Taking my E65 small angle brush by Sigma and Maybelline’s Eye Studio Lasting Drama Gel Eyeliner in Blackest Black – carefully line my lid, flicking it out only a little to create a suble cat eye effect.

cat eye crease

~ Step 6 ~

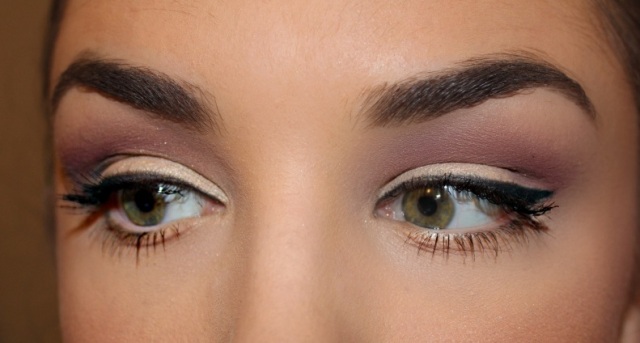
I Finish off my eyes by applying a few coats of Maybelline’s new Volum’ Express® the Mega Plush® Mascara in blackest black to my top lashes and just one coat to the bottom. HEY PRESTO we’re done!

cut crease final

So don’t be shy – go and give it a go! Once you’ve tried it a few times you’ll love it I’m sure 🙂 So hope you enjoyed and I would love to hear any feedback – especially if you gave it a go yourself 🙂

xoxo