My Foundation Routine!!

HOWDY HO BABES!

I get asked all the time about my foundation routine, so I thought I would do an updated step by step guide of what I do and what works for me. Please note I am aware that this might seem like a lot of makeup for some but I like it so, that’s that! If you would like to see how I achieve this, then read on my loves!
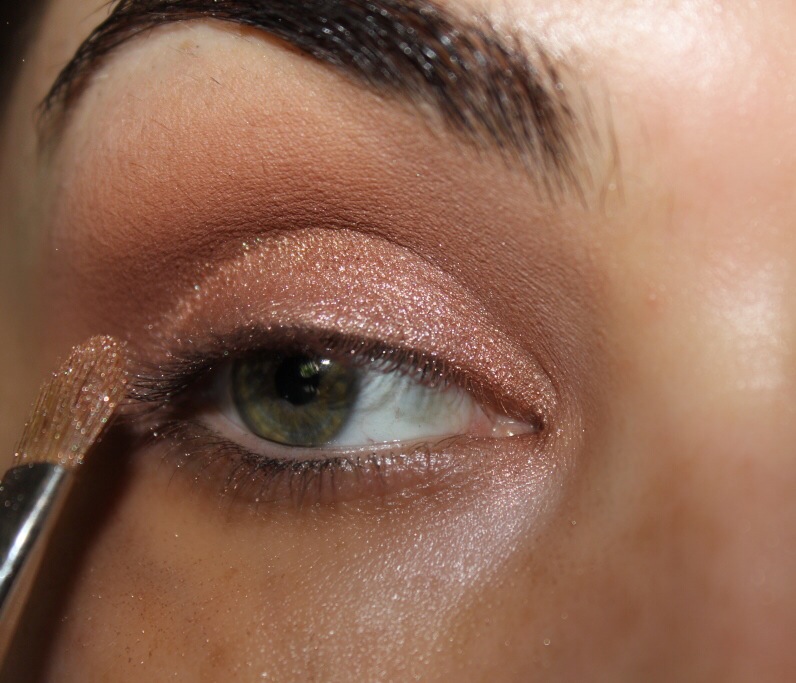
~ PREP AND PRIME ~

For me this is one of the most IMPORTANT steps to having a flawless face and I do this on both myself and all my clients. By doing this it really helps make the makeup last all day and night 🙂 Firstly you need to understand your skin type so know you know how best to prep and prime your skin. For me, my skin is on the dry side so I prep my skin by rehydrating it with my holy grail moisturizer combo of Embryolisse 24 Hour Miracle Cream, and Bobbi Brown’s Hydrating Face Cream. I Let that sink in for about 5 minutes (this is where I usually go and do my eyes, and then come back and finish off my face). To prime my face I apply Hourglass’s Veil Mineral Primer and then apply my favourite illuminizer, MAC’s Strobe Cream.

/home/wpcom/public_html/wp-content/blogs.dir/69d/45502932/files/2015/01/img_8243.jpg

~ FOUNDATION APPLICATION~

I am a HUGE fan of actually mixing different foundations. It’s rare to find or expect one foundation to give you the exact colour or coverage you want or so, I am always experimenting and trying out different combos. Currently this is the one that I am really digging… Taking my new fave liquid foundation by Make Up Store in the colour Honey (which doesn’t appear to be on their site however, if you contact the store directly then they can make arrangements to ship to you. Click here for the store closest to you) together with EX1 Cosmetics Invisiwear Liquid Foundation in the colour 200 (or 300 if I am more tanned or have some fake tan on). I take two pumps of the Makeup Store foundation and one pump of the EX 1 foundation, mix it together and apply all over my face with my trusty Beauty Blender.

/home/wpcom/public_html/wp-content/blogs.dir/69d/45502932/files/2015/01/img_8244.jpg

/home/wpcom/public_html/wp-content/blogs.dir/69d/45502932/files/2015/01/img_8246.jpg

~ CONCEAL AND HIGHLIGHT ~

To conceal my dark circles I take NARS Radiant Creamy Concealer by NARS in the shade Honey and place this directly under my eyes in a “C”shape. To highlight my face I take the same concealer but in the shade Ginger and place it under where I placed the Honey shade, under my eyes  in an upside down triangle shape. I then take this colour down the bridge of my nose and up to my forehead and a little on my upper lip and chin. To blend this all out I use my Beauty Blender, again 🙂

/home/wpcom/public_html/wp-content/blogs.dir/69d/45502932/files/2015/01/img_8249.jpg

~ SETTING AND CONTOURING ~

To set my concealer I use The Chisler Brush by Hair and Makeup Addiction with Chanel’s Le Blanc Fresh Glow Loose Brightening Powder. As I am naturally dry I prefer a dewy look so I don’t like to use a lot of powder, so, to set the rest of my face I use another Make Up Store product, their Micronized Compact Powder in Latte (again not on the website so if you want to contact your closest store – click here).  To apply this I use the Blush Brush by Real Techniques and gently pat it over the foundation. To contour and carve out some cheek bones I use the NARS Ita Kabuki Brush and Too Faced Chocolate Soliel Matte Bronzer with my MAC 168 Large Angled Contour Brush.

/home/wpcom/public_html/wp-content/blogs.dir/69d/45502932/files/2015/01/img_8252.jpg

/home/wpcom/public_html/wp-content/blogs.dir/69d/45502932/files/2015/01/img_8251.jpg

/home/wpcom/public_html/wp-content/blogs.dir/69d/45502932/files/2015/01/img_8253.jpg

~ BLUSH, GLOW AND SET ~

For my blush I use MAC’s Mineralize Blush the shade Warm Soul as it’s a mid tone beige colour with gold pearl in it. Tried to find this on the Australian MAC website but for some reason it’s not there, yet I know for a fact that you can buy in store. To apply this is I take a clean MAC 168 Large Angled Contour Brush. To help add a little more glow to my skin I take my Hourglass Ambient Lighting powder in the shade Luminous Light and my Sigma F35 Tapered Highlighter Brush and place it under my eyes where I highlighted earlier with my concealer. I then take The Multitasker by Hair and Makeup Addiction Finishing and Mary-Lou Manizer by The Balm and highlight the bridge of my nose and a little into my forehead. To finish it off and set my face I take MAC’s Fix Plus Spray and spritz my face a few times all over, let that dry – ANNNNNNNND… BAM I’M READY TO GO! Hahaha!

/home/wpcom/public_html/wp-content/blogs.dir/69d/45502932/files/2015/01/img_8254.jpg

/home/wpcom/public_html/wp-content/blogs.dir/69d/45502932/files/2015/01/img_8259.jpg

Ok so there you have it, that is my full faced, every day foundation routine. Pretty easy I think, so hope you like and if you have any questions or comments I would love to hear from you.

Much love, till next time xoxo

Bronzed Glow like J Lo

HEYA!

So I don’t know about you but I have major girl crush on J Lo (still love calling her that) – how could I not – her style, figure, personality and her flawless face. So if you want to see how I did this – read on…

… E  Y  E  S …

~ STEP 1 ~

First I start off by priming my eyes as always with my Shadow Insurance by Too Faced and then with MAC’s Paint Pot in Soft Ochre. Setting this with a mixture of Beaches and Cream and Peach Smoothie both by Makeup Geek all over my lid and up to my brow bone. Then, taking Soft Brown by MAC on my Sigma E40 Tapered Blending Brush I blend this into my crease and just above as this will be my transition colour.

/home/wpcom/public_html/wp-content/blogs.dir/69d/45502932/files/2015/01/img_8090.jpg

~ STEP 2 ~

To darken up my crease further, I take Texture by MAC on an Sigma E25 Blending Brush and blend that into my crease. Repeating until it is as dark as I want it to be.

/home/wpcom/public_html/wp-content/blogs.dir/69d/45502932/files/2015/01/img_8095.jpg

~ STEP 3 ~

Taking Cocoa Bear by Makeup Geek I apply it to my outer V and blend into my crease with my Sigma E45 Small Tapered Blending Brush and again repeating until it is as dark as I want.

/home/wpcom/public_html/wp-content/blogs.dir/69d/45502932/files/2015/01/img_8097.jpg

~STEP 4~

Taking Tan Pigment by MAC and apply on my lids using my MAC 242 Shader Brush to blend it out till it becomes a nice glow.

/home/wpcom/public_html/wp-content/blogs.dir/69d/45502932/files/2015/01/img_8096.jpg

/home/wpcom/public_html/wp-content/blogs.dir/69d/45502932/files/2015/01/img_8098.jpg

~STEP 5~

Now you could stop here but I wanted to make it a touch darker. So, taking Embark by MAC I apply that to the outer V with my Sigma E45 Small Tapered Blending Brush and blend it directly to my outer V keeping extending it out to help enlarge the eye.

/home/wpcom/public_html/wp-content/blogs.dir/69d/45502932/files/2015/01/img_8099.jpg

~ STEP 6 ~

Here I curl my lashes using my MAC Full Lash Curler and then coat my lashes with a combination of In Extreme Dimension Lash by MAC and Bobbi Brown Smokey Eye Mascara. Let that dry for a few minutes. Again, you could also stop here or you could apply some false lashes. I chose to go ahead and apply No. 43 lashes by MAC wtih DUO Adheasive. While that is drying I apply a light coat of Cocoa Bear by Makeup Geek under my lower lashe line and heavily coat my lower lashes with Bobbi Brown Smokey Eye Mascara and TADAAAA! My eyes are done! Now onto the base…/home/wpcom/public_html/wp-content/blogs.dir/69d/45502932/files/2015/01/img_8100.jpg

/home/wpcom/public_html/wp-content/blogs.dir/69d/45502932/files/2015/01/img_8156.jpg

… F  A  C  E  …

For me this is the REAL feature of this look. I really wanted to emulate J Lo’s bronzed glowing skin. So here is what I did and used to achieve that.

~ STEP 1 ~

As my skin is on the dry side I start by priming my face with Embryolisse 24 Hour Miracle Cream, and Bobbi Brown’s Hydrating Face Cream. I Let that sink in for about 5 minutes and then finish priming my face by applying Hourglass’s Veil Mineral Primer and then apply my favourite illuminizer, MAC’s Strobe Cream.

~ STEP 2 ~

Taking my new favourite liquid foundation by Make Up Store in the colour Honey and mixing in their TO DIE FOR Illuminizer. It doesn’t say what the shade is but as you can see from the pic below it is a bronzed shade and I’m fairly certain its the only one they have. It also doesn’t appear to be on their site however they said that if you contact the store directly then they can make arrangements to ship to you. Click here for the store closes to you. So, taking about 2 pumps of the foundation and a small pump of the illuminizer and mix it together and apply all over my face with my trusty Beauty Blender.

/home/wpcom/public_html/wp-content/blogs.dir/69d/45502932/files/2015/01/img_8155.jpg

~ STEP 3 ~

Taking my holy grail concealer – Radiant Creamy Concealer by NARS in the shade Honey and place this directly under my eyes. Taking the same concealer in the colour Ginger I place this just under my eyes and then taking the same concealer but in the shade Ginger I apply that in an upside down triangle shape under my eyes, down the bridge of my nose and up to my forehead and a little on my chin. Taking my Beauty Blender I blend all that out. To set this I use Chanel’s Le Blanc Fresh Glow Loose Brightening Powder.

~ STEP 4 ~

Taking another Make Up Store product, their Micronized Compact Powder in Latte and set my foundation. I don’t like to use a lot of powder as I am naturally dry and I want this to be a particularly dewy look. So I usually prefer to apply this with a big fluffy face brush and pat that over where it’s needed. To contour my face I use Too Faced Sun Bunny Bronzer with my MAC 168 Large Angled Contour Brush – I like this bronzer for this look as it helps add a further glow and bronzed look to the skin.

~ STEP 5  ~

For my blush I use MAC Mineralize Blush the shade Love Joy as it’s a warm mid tone brown shade with gold pearl in it. I tried to find this on the Australian MAC website but for some reason it’s not there anymore yet I know for a fact that you can buy in in store. Taking my Hourglass Ambient Lighting powder in the shade Luminous Light and my Sigma F35 Tapered Highlighter Brush and place that where I highlighted earlier with my concealer. Finishing off by setting my face using Make Up Store’s Face Mist Spray which can actually double up as a prepping agent for your skin or to set your makeup. Like I mentioned earlier this doesn’t appear on their site but if you check the store locator for the closest one to you they will ship to you.

/home/wpcom/public_html/wp-content/blogs.dir/69d/45502932/files/2015/01/img_7511.jpg

And I’m done!

So, that is my take on J Lo’s bronzed summer glow. What do you think? Let me know, I would love to hear from you…

Till next time xoxo


30 Days of Beauty – Part 3

So here we have it! The final part of my 30 Day Beauty Challenge.

~ DAY 21 ~

…Before & After…

So here is my before – without without makeup or hair done. All I’ve done here is primed my face with Embryolisse Lait-Crème Concentrè and my Egg Pore Silky Smooth Balm by Tony Moly then primed my eyes using Shadow Insurance by Too Faced.

20140604-101348-36828668.jpg

And here is my after – details are as follows:

Face: Foundation is Studio Sculpt by MAC Cosmetics with Bobbi Brown’s Corrector and Radiant Creamy Concealer by NARS – applied and blended with a Beauty Blender (I get mine from ModelRock Lashes)

Cheeks: Blush – Hot Mama by The Balm

Eyes: In the crease I have Crème Brûlée and Cocoa Bear both by Makeup Geek on my brow bone is a mix of Vanilla Bean and Beaches & Cream again both by Makeup Geek. On my lid I have Honey Honey and Crisp Apple Strudel from the “A Few of My Favourite Things Palette” by Too Faced (was limited edition and I think its sold out now) then lining my lid into a cat eye flick with Schwing Liquid Liner by The Balm and a few coats of Goddess Mascara by Eye of Horus Mascara topping them with No. 1 lashes by Lashes in a Box. On my lower lash line I have Long-Wear Cream Shadow Stick in Violet Plum by Bobbi Brown and Drama Queen by Makeup Geek over the top.

20140604-101736-37056931.jpg

~ DAY 22 ~

…Perfume…

What more could a girl need but sweet scents and champagne…

Chance by Chanel us my favourite scent for summer – I adore it. Its so fresh and crisp. when I put it on I feel happy and ready to take on the day. To me perfume is like your own personal theme song – it just finishes a whole look off right.

20140604-102247-37367947.jpg

~ DAY 23 ~

…Makeup Storage…

Come to mumma! Just ordered this bad boy – the final piece in my makeup storage collection. Its a freestanding case that comes complete with its own lights, mirror, and electrical outlet! It has ample room for my makeup supplies also! I got it from the Makeup Artist Network – they also have loads of other storage items – check ’em out.

20140604-103731-38251115.jpg

~ DAY 24 ~

…Runway Inspired…

I was looking through photos of the makeup from NYFW 2014 and there were so many great looks – but the look that The Blondes had designed for them by MAC Cosmetics lead makeup artist Kabuki caught my eye. I loved everything about it – such a crisp simple look but it really catches your eye. So I tried to mimic the yellow and aqua blue winged liner – products and details are below:

Jumbo Eye Pencil in Milk by NYX Cosmetics all over my lid and drew it out into a cat eye flick using my Liner Brush by Hair and Makeup Addiction to get the shape right. Taking a bright sunny yellow shade from my 252 Ultimate Palette by Coastal Scents, I pack that on with the same liner brush, all over my lid. Using Texture by MAC Cosmetics I place that above the yellow shadow. Lining my lower lash line with the same Jumbo Eye Pencil by NYX – then taking a light sky blue shade from the same 252 Ultimate Palette and packing that over the top of where I placed the Jumbo Eye Pencil. Finishing the look off I line my lash line in a small cat eye flight with my Eyestudio Long Lasting Drama Gel Eyeliner in black by Maybelline and coated my lashes with Le Volume De Chanel Mascara.

20140604-104523-38723854.jpg

~ DAY 25~

… Celebrity Inspired…

Today I took inspiration from my all time she rocks the smokey eye well… So here is my take on it, details are below:

Primed my eye with Shadow Insurance by Too Faced then used a mixture of my Jumbo Eye Pencil in Dark Brown by NYX Cosmetics and Dash Eyeshadow Base by Sigma blended together as a base for the darker shadows. On the outer V is Mocha, above the crease is a combination of Brown Sugar and Country Girl all by Makeup Geek on my inner lid is a combination of Honey Honey and Buche De Noel from the “A Few of My Favourite Things Palette” by Too Faced (was limited edition and I’m pretty sure it’s sold out now). Taking my Long-Wear Eye Pencil in Jet by Bobbi Brown I tightline my upper and lower lash lines – smudging out the top liner. Finishing off with 2 coats of Le Volume De Chanel Mascara

20140604-105821-39501761.jpg

~ DAY 26~

… Favourite Era…

Is the 50s by far! During the 50s, beauty trends reached a completely new level and women everywhere participated by utilizing revolutionary new colors, products and techniques. It’s also where my favourite technique – cat eye flick – really came about. See below for the deets: ️

Primed my eyes with Shadow Insurance by Too Faced, placed Blanc Type by MAC Cosmetics over my lid and all up to my brow bone. In the crease I have a mixture of Haux, Malt and Kid – all by MAC Cosmetics. For my cat eye flick I used my favourite liquid liner – Schwing Liquid Liner by The Balm and finished it off by applying a couple of coats of Le Volume De Chanel Mascara on my top and bottom lashes. On my lips is En-Joystick in Retro Red by Kardashian Beauty.

20140604-105136-39096220.jpg

~ DAY 27~

… Face Mask/Scrub…

I have tried a lot of face cleansers and scrubs but of all the products Michael Todd True Organics are the best! I take my skin care routine very seriously – I already use the Tropical Fruit Scrub and now since adding this – Wild Berry Exfoliating Peel – into the mix my face has never felt better. It is so smooth and the best part… they are made with all natural ingredients and do not test on animals!! Plus this peel smells DIVINE – much like strawberry jam!!! I would highly recommend giving these a try! I doubt you’ll regret it!

20140604-110116-39676225.jpg

~ DAY 28~

…Wish List…

So I compiled a little collage of some of the things that are on my wish list for my up coming trip to the US… ️Details️:

Chanel Vintage Vanity Case, Naked 3 Palette by Urban Decay, Chantecaille Rose De Mai Cream, Tom Ford Eyeshadow Quad in Cognac Sable, YSL Rouge Volupté Lipstick in Nude Beige, YSL Gloss Volupté in 101 Iridescent, Makeup Forever 12 Flash Colour Case, Neo-orange pigment from the Playland Collection by MAC Cosmetics, Hourglass Cosmetics Ambient Lighting Powder in Diffused Light & Ethereal Light.

20140604-110346-39826125.jpg

~ DAY 29~

…Favourite High End Products…

This is a collection of my current favourite high end products from my kit.️ Details:

Chanel Precision Gentle Eye Makeup Remover – hands down the best eyemakeup remover on the market, it gets everything off & it doesn’t leave your eyes feeling dry or over oiled. YSL Glossy Stain in Dangerous Pinktalk about a long lasting gloss, perfect for brides & bridesmaids. Chanel Precision Mousse Douceur Rinse Off Foaming Cleanser – this is so luxurious, it makes my skin feel like it’s been to a spa & had a facial without me having to actually leave the house! YSL Rouge Volupté lipstick in no. 38 – this is the perfect summer colour and it has surprising staying power and leaves your lips feeling well moisturized. Chanel Soleil Tan De Chanel Bronzing Makeup Base – this Bronzer leaves my skin with the most natural sun bathed look, I wear it on it’s own in summer or under my foundation for a more bronzed look – either way it’s completely easy to use the perfect bronzer in my opinion. Chanel Natural Loose Finish Powder in 20 Claire – this is the perfect setting powder as it’s so fine! It helps me set my makeup while allowing my skin to hold a dewy finish – a little goes a long way with this product. Chantecaille Radiance Gel Bronzer – this is another great bronzer – I prefer to use this one for over the top of my foundation as it seems to sit better that way.

20140604-110514-39914468.jpg

~ DAY 30~

…Brights

Today’s look I added a pop of lime green… What do you think? Products and details are as follows:

Primed my eyes with Shadow Insurance by Too Faced, then using my Jumbo Eye Pencil in Milk by NYX Cosmeticsnot into the crease. Then taking a bright neon green shade from my 252 Ultimate Palette by Coastal Scents and pack that all over the lid. Taking Texture by MAC Cosmetics I place that into and above my crease, darkening up the crease and my outer V with Mocha by Makeup Geek. I use that same colour and line my lower lash line as well. Using Schwing Liquid Liner by The Balm to line my lid and out into a cat eye flick. Finishing off with a couple of coats of Le Volume De Chanel Mascara – and there you have it! A subtle pop of green for a little fun!

20140604-104045-38445793.jpg


Well that’s it my friends, I hope you liked this for something different and stay tuned for my next post…

Till next time xoxo


30 Days of Beauty – Part 1

Hey my lovelies,

As most of you may or may not know I completed a self-imposed 30 Day Makeup Challenge last year so I decided it was high time I did another one. After much thought I decided to make one not based solely on makeup looks but about beauty in general as well. I dont know if any of you have partaken in a 30 day beauty/makeup challenge but I actually find them to be tricky… especially seeing as I work in an office for the majorty of my day I have to somehow make it “work appropriate”. Anyway without any further delay please find the whole 30 Days of Beauty Challenge by yours truely…

~ THE CHALLENGE ~ 

20140409-161844.jpg

~ DAY 1 ~

…No makeup, makeup…

This is would have to be my go to makeup look. This is the look I usually wear on weekends if I have nothing really that special on but I might be out to lunch with a friend or just running errands 🙂 Its super easy, fresh and light on the skin. Products used are as follows:

  • Embryolisse Lait Creme
  • Tony Moly Egg Pore Silky Smooth Balm
  • Garnier BB Cream Oil Free
  • Bobbi Brown Corrector in Light to Medium Peach
  • Nars Radiant Creamy Concealer
  • Chanel Natural Finish Loose Powder
  • The Balm Hot Mama Blush
  • MAC’s MSF in Soft and Gentle
  • Eye of Horus Goddess Mascara

20140505-111920.jpg

~ DAY 2 ~

…Lip Cocktail…

If you’re coming into winter, or maybe you’re like me & are just prone to dry lips you find yourself always reaching for your pawpaw or chapstick… well here is my cocktail for, dare I say it – more kissable lips?
1. Firstly you will need to start with a lip scrub (anyone will do) – the one I am using here is my Santas Lip Scrub by Lush (limited edition for Xmas but they have other delicious flavours such as bubblegum). Take a tiny bit & place on your lips & scrub scrub scub. The best part about this scrub is it’s made up of all natural ingredients & you can just lick it off when you’re done – yup thats right ladies/gents it’s edible :O – and delicious 🙂
2. Once you’ve scrubbed your top & bottom lip apply some moisturizing lip balm (again any one will do) – I like to use Lucas Papaw Ointment (it’s da bom). Apply a generous layer & let it sink in so your lips are fully moisturized
3. After the balm has sunk in, apply your chosen lipstick – here I am using Rouge Allure in number 88 by Chanel.      4.  To finish it off I’ve applied a nude lip gloss by Bobbi Brown in the colour Buff 4 over the top.

So there you have it, fresh and ready to do some kissin’ haha!

20140502-145324.jpg

~ DAY 3 ~

… Victoria’s Secret Bombshell…

By no means do I even compare to the Victoria’s Secret beauties – but I thought I would attempt to give their stunning effortless makeup look a go. They are always so glowy and fresh – with an oh so subtle slight smoked out eye… Products are below:

20140502-152959.jpg

~ DAY 4 ~

…Evening Look…

This is just a fun look that I actually normally would wear out at night – or even for something bold during the day. It features one of my most FAVOURITE brands – Makeup Geek and their pigment Utopia. I actually posted a little video on my instagram of how I did this look if you want to go check it out 🙂 A List of products used is below:

20140502-154430.jpg

~ DAY 5 ~

…Lashes…

I firmly believe that, like a great pair of shoes complete an outfit – lashes do the same for your makeup. I love them all – from the subtle to the not so subtle… They can really help open up the eye and add a dramatic flair. The pair I am wearing in the picture below are one of my favourite dramatic lashes by Velour Lashes in the style “Doll Me Up”

20140502-160950.jpg

~ DAY 6 ~

… Favourite Body Products (top 5)…

Here are my top 5, can’t live without, body products… Clockwise from L-R:

  • Kerastase Réflection Masque Chroma Captive – this conditioner is AMAAAAAZING. I use this on mainly the ends of my hair as they’re dyed so need a little extra love – I leave it in for approx. 5mins & wash it out – result: super soft hair!!
  • Clarisonic Mia 2 – this is my true skin savior… I’ll admit I bought this on a bit of a whim – but I have not looked back. It helps ensure my face is 100% clean, improved the overall elasticity of my skin & the way it absorbes moisturiser
  • Clinique Skin Sparkle Exfoliant – this is the best I’ve ever used. It does an amazing job of helping leave my skin smooth like a babies bottom but it also contains salicylic acid & menthol which help leave the skin feeling smooth & refreshed not tight & dry like a lot of exfoliants do
  • Michael Todd True Organics – Tropical Fruit exfoliant – I use this is on my face & I love that it’s made out of all natural ingredients is perfect for my sensitive skin 
  • Kerastase Bain Elixir Ultime shampoo – I love how this leaves my hair soft but not flat plus it smells divine!

20140502-163420.jpg

~ DAY 7 ~

…Eyebrows…

I have pretty full brows as it is – but in my opinion that’s even more of a reason to maintain them. In order to get the shape I want I get them threaded at the brow spa in David Jones (Elizabeth Street Store) then taking my Brow Powder Duo in Medium by Sigma and my no.12 large synthetic duo brush Anastasia Beverly Hills I concentrate on filling in the beginning and the end of my brow  then taking my Clear Brow Gel by Anastasia Beverly Hills I set it all in place. I usually only do this if I’m going out at night and want a more dramatic look.

20140502-164337.jpg

~ DAY8 ~

…Drugstore Makeup Look…

This look is for those of you who are might just be beginning with makeup, or are on a budget or just don’t want to spend a lot on cosmetics… all products purchased from Priceline:

20140502-165611.jpg

~ DAY 9 ~

 …Fave Makeup Products…

These are a few of my all time favourite products that I find myself reaching for time and time again – and each time I use them I remember why I fell I love with them…

1. Strobe Cream by MAC Cosmetics- this is hands down the best illuminating cream I’ve used so far. It smells great and really helps my skin glow 

20140505-094756.jpg

2. Radiance Gel Bronzer by Chantecaille – as I’ve got dry skin I prefer this to using powders as it blends super easy & helps give my skin a more natural sun kissed glow. 

20140505-100940.jpg

3.  Glam Eyes Liquid Liner by Rimmel – this in my opinion the easiest liquid liner to use, super pigmented and it’s affordable!

20140505-101133.jpg

4. Sheer Glow Foundation by NARS – this is a gorgeous full coverage foundation but still helps give a natural finish. A little goes a long way.

20140505-101209.jpg

5. My own personalised neutrals palette of Makeup Geek eyeshadows. These shadows are seriously amazing – high quality, super pigmented and completely affordable!

20140505-101359.jpg

6. Melon Pigment by MAC Cosmetics – this is my go to colour for summer – it’s stunning and pairs beautifully with reddish brown shadows – really makes green eyes pop!

20140505-101954.jpg

7. Naked Pigment by MAC Cometics – this is beautiful natural pigment that you could even use as a highlight on your cheekbones

20140505-105719.jpg

~ DAY 10 ~

…Bridal…

Here is a shot of my gorgeous friend Alex, I did the makeup for her wedding – she wanted very sheer, minimal makeup. I was lucky in that she had taken my advice from the trial we did & really worked on rehydrating her skin & looking after it. As you can see the end result was flawless. Products are as follows:

20140505-112403.jpg

Alex’s Photographs were taken by Lovelight Photography

Stay tuned for Part 2 later in the week…

Till next time xoxo