Today’s tutorial is on a look I came up with that can go from day to night, and has a slight smoked out effect. I feel this will fast become one of my go to day to night smokey looks. It definitely makes blue and green eyes pop! So if you’d like to see how I completed this look READ ON!
~ COLOURS USED ~
Todays look I’ve used all shadows by Makeup Geek and a pressed pigment by MAC Cosmetics called Day Gleam.


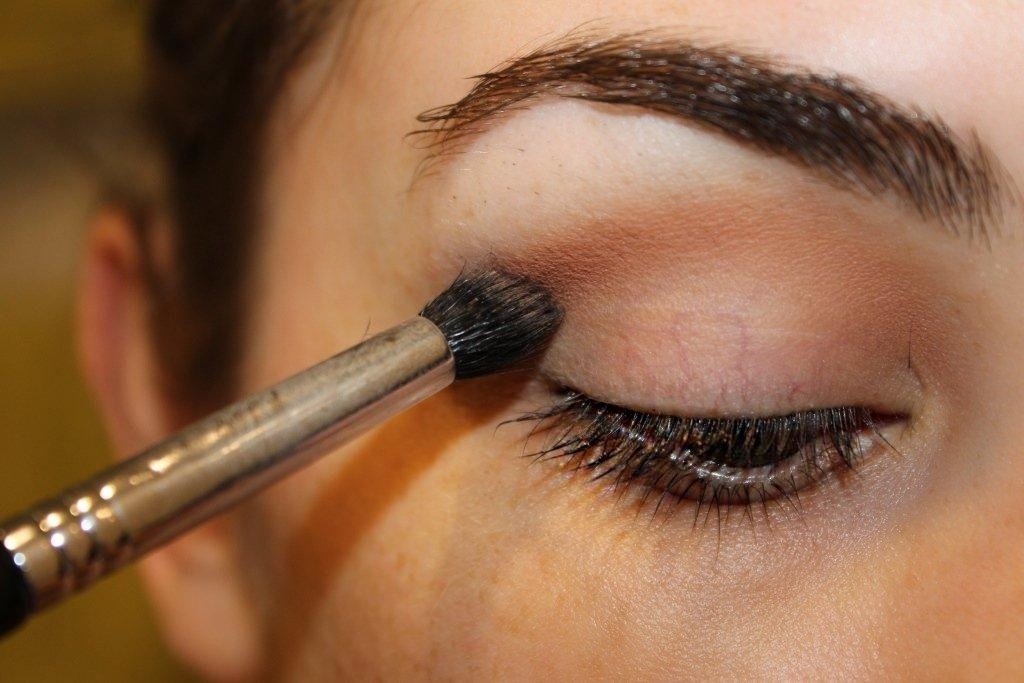
~ STEP 1 ~
As always, I start off by priming my eyes with my trusty Shadow Insurance by Too Faced. Then taking the colour Beaches & Cream I using my big fluffy blending brush (E35) I blend that into my crease and all over my lid and all the way up to my brow bone. Taking more of that same colour I concentrate it into the crease and keep blending till I am happy with the colour.

~ STEP 2 ~
Taking the colour Nearly Naked I use a slightly less fluffy blending brush (E25) for more precise shadow placement, and blend that out into my crease and just above. I go in a few times to darken and smoke out the colour more.

~ STEP 3 ~
As I want to really help make my eyes pop, I take the colour Cocoa Bear to deepen the crease further. Using the same brush I used before, I blend the colour out into my crease and onto my inner corner and outer V. With this step, you want to make sure you keep the centre of the lid free of colour – for now…

~ STEP 4 ~
Taking a more precise blending brush (E45) I blend the all the colours together so there are no harsh lines or edges. this helps to also keep the centre of the lid shadow free.

~ STEP 5 ~
Taking the pressed pigment Day Gleam by MAC Cosmetics, I take my ring finger and lightly swirl it around picking up the colour with my finger and pressing it into the Centre of my lid.

~ STEP 6 ~
Then taking a small crease blending brush (E47) I take the colour Mocha and darken up just the outer V and bring that into just my crease and blend it out. This will help to smoke out the look whilst adding some depth to it as well.

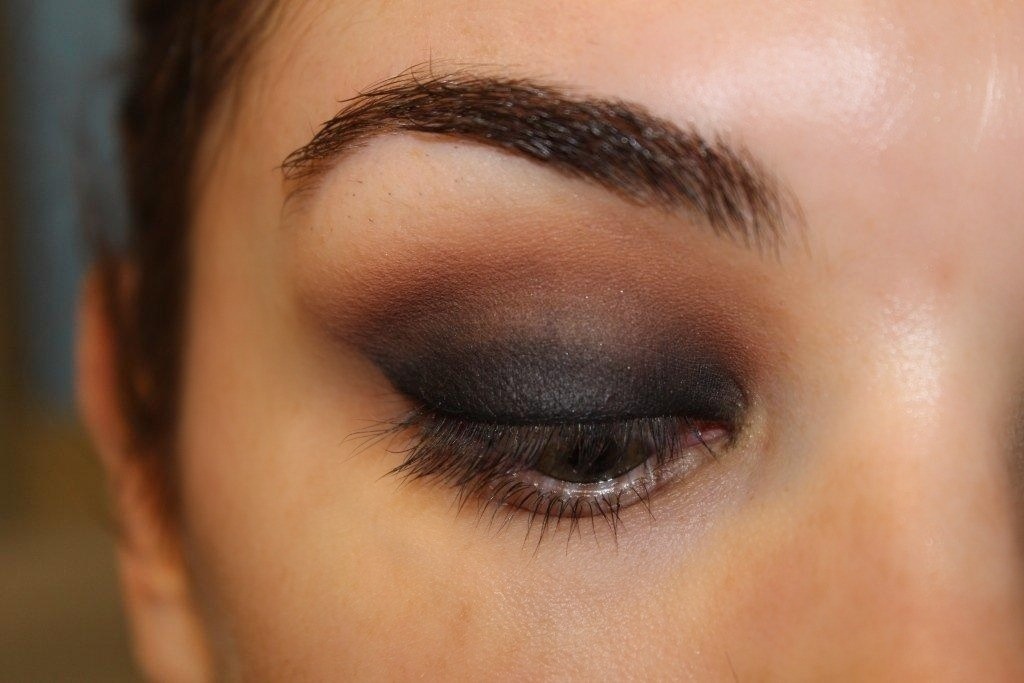
~ STEP 7 ~
I go over the crease again with my big fluffy blending brush and go over the crease and ensure there are no harsh lines. As I want this look to be really smokey I decide not to use a liquid liner but rather an eye pencil (Long-Wear Eye Pencil in Mahogany by Bobbi Brown) and smudge it out using The Liner brush by Hair and Makeup Addiction. I also decide to take more of Day Gleam and place it into the centre of my lid and right into my inner corner.

~ STEP 8 ~
I curl my lashes with MAC Cosmetics Full Lash Curler and then apply a couple of coats of Smokey Eye Mascara by Bobbi brown (am really loving this at the moment) and finish off my under eye by taking the same eye pencil I used earlier and smudging it with the same liner brush under my whole waterline and then lining my waterline with it. Going over the top of the liner with the colour Cocoa Bear and coating my lower lashes with the same Smokey Eye Mascara.

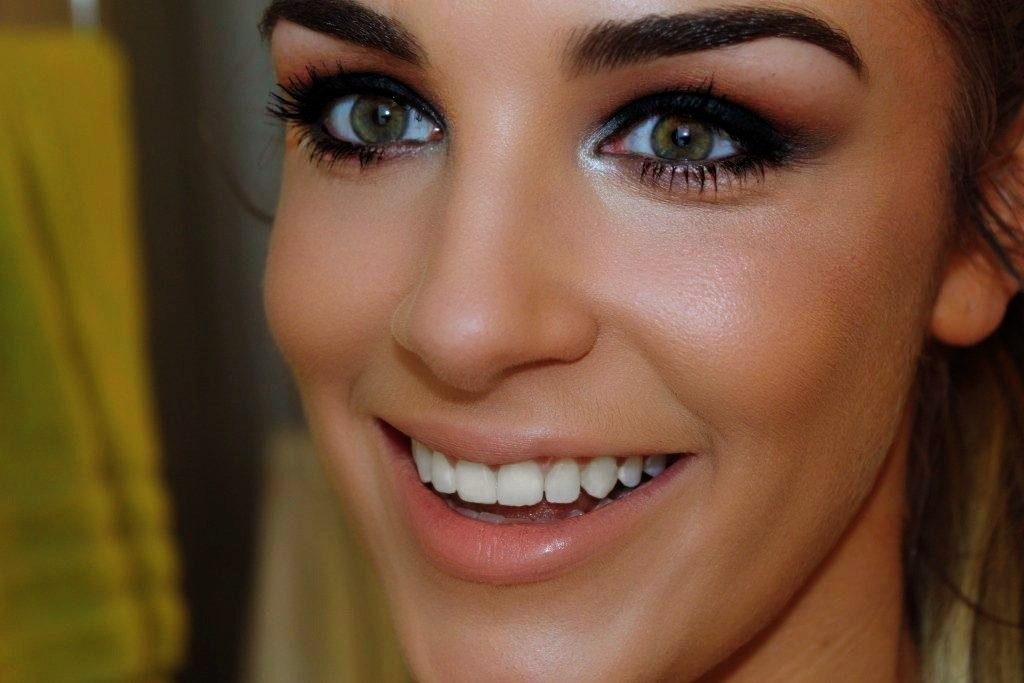
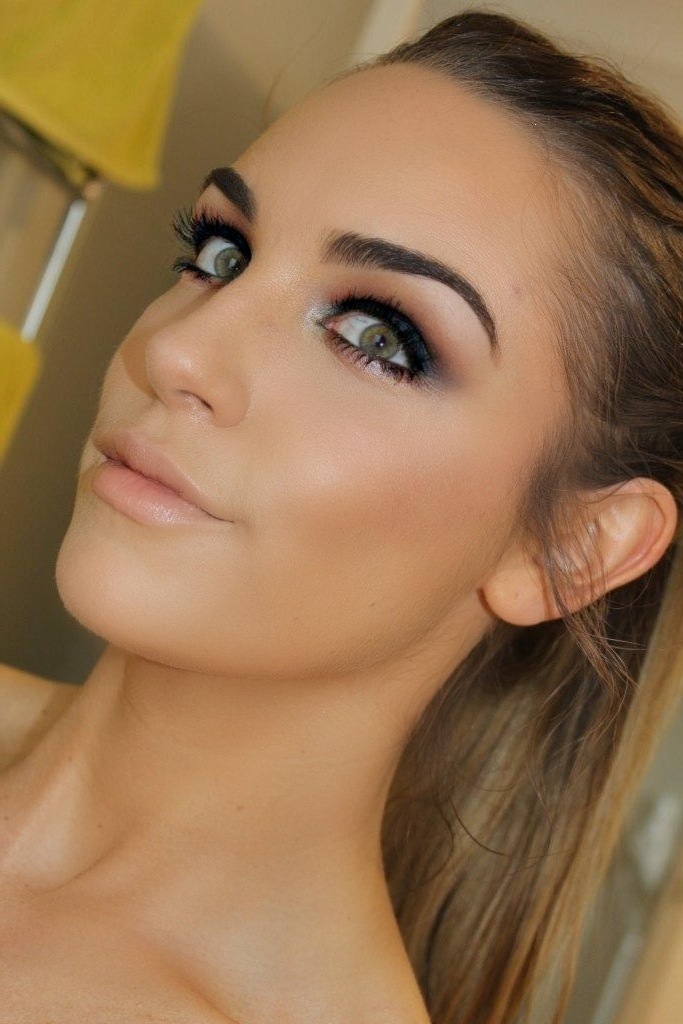
… FINISHED …
So here you have the finished look. You chould choose to add false lashes if you wish but I just chose to go au natural-ish and just stick with mascara.


Hope you like this one – let me know what you think or if you try it for yourself…
Till next time XOXO