Here we have Part 2 of my 30 day challenge – I hope you like what I came up with…
~ DAY 11 ~
…Holy Grail Makeup Products…
Here are my top can’t live without, never fail me, multi-purpose makeup products. Would any of these on your list? What are yours?
- Shadow Insurance by Too Faced – this is hands down the best eye primer I’ve ever used – ever! I originally bought this to help with wearing cream shadows – and OH M GEEE! When I use this my shadows never move or crease no matter how long it’s been on for. The actual product itself will last you ages as you only need the tiniest amount and it’s not overly expensive.
- Mary-Lou Manizer by The Balm – THIS is amazing. I love it. I love how when applied it adds instant glow to the face but doesn’t leave you looking like a disco ball. I’ve used this on so many clients and they all love it. This is very pigmented so a little goes a long way with this one.
- Egg Pore Silky Smooth Balm by Tony Moly (i actually buy mine from ebay) – this is THE most amazing primer… EVER! Again – you don’t need much to make a big impact. I use it on all my clients and they cannot believe the end result after using it. It really helps keep your makeup in place all day and night and blurs out all pores and imperfections. I’ve also found it can even counteract red pigmentation to a degree.
- Fix + by MAC Cosmetics – THIS I can’t and will not live without. Personally and for my clients or myself I like to use it as a spray moisturiser pre makeup application. It’s super hydrating and it absorbs into your skin and doesn’t affect the oiliness of your skin. I also like to apply this post makeup application as it helps take away the powdery look you sometimes get as well as cementing your makeup for all day and night (plus it smells so sexual!)
- Luxury Face Kit from Hair and Makeup Addiction – I love these brushes – not only are they are incredibly soft and easy to use, they BLEND LIKE A MO FO! My makeup has never looked better and they clean so easy. My favourite part – they are VEGAN FRIENDLY!!

~ DAY 12 ~
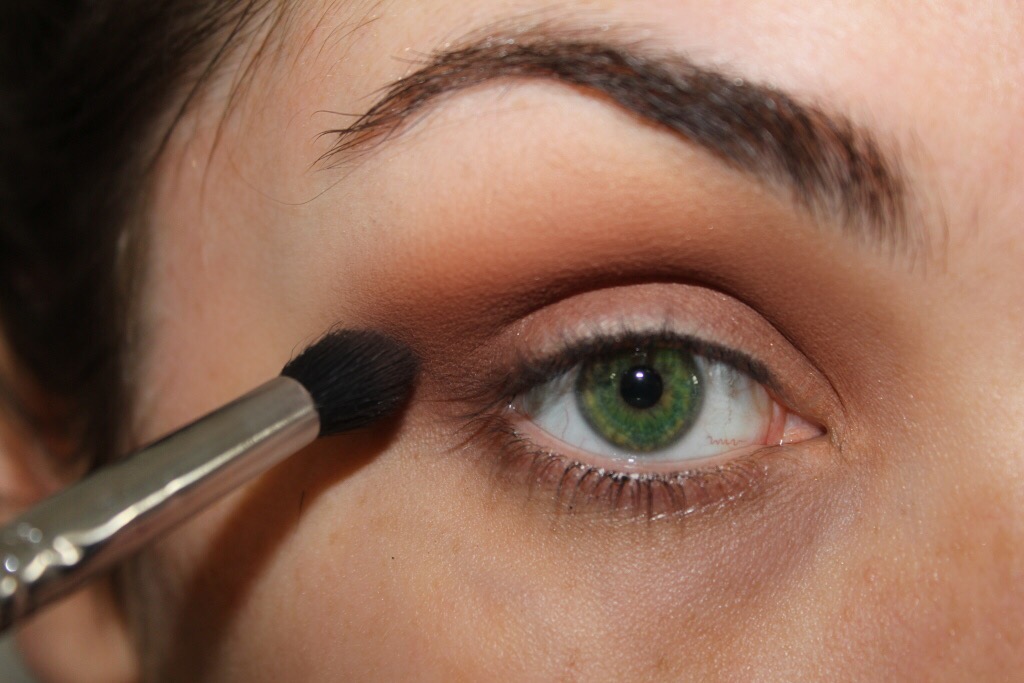
…Everyday look…
This is my go to look, when Im rushed for time or just want to keep it simple. Details are as follows:
Started off with my trusty Shadow Insurance by Too Faced. In the crease I have Texture by MAC Cosmetics with Embark by MAC Cosmetics to darken it up andthen darkening my outer V. On the lid is a combination of Jest and Mythology again, both by MAC Cosmetics. I line my lids in a cat eye flick using Schwing Liquid Liner by The Balm. Using Goddess Mascara by Eye of Horus Mascara on my lashes. Foundation is NARS Sheer Glow, contoured my cheeks using Contour Kit by Sleek Makeup in Light. On my cheeks I have a combination of Warm Soul by MAC Cosmetics and Hot Mama Blush by The Balm – highlighted my face with Mary-Lou Manizer both by The Balm. On my lips is my fave combo of Rouge Allure in no. 88 by Chanel with Bobbi Brown Lip Gloss in Buff 4. Spritzing my face with a few sprays of Fix +by MAC Cosmetics.
~ DAY 13 ~
…Favourite Mascara…
To me your eyes arent completed until you apply your mascara – I have a few favourites ranging from drugstore to high end. Today I am talking about Le Volume De Chanel by Chanel. Yes, this is an expensive mascara but the return on investment is high and well worth it. It gives me incredible volume and thickness – and removes the need for me to wear falsies. I love wearing false lashes but I dont want to wear them all the time. I will say that this is a very wet formula and can clump a little, but thats what helps give the whole illusion and makes it look so voluminous. It stay ALL day, and does not smudge! You will not regret trying this!
~ DAY 14 ~
…Bronze…
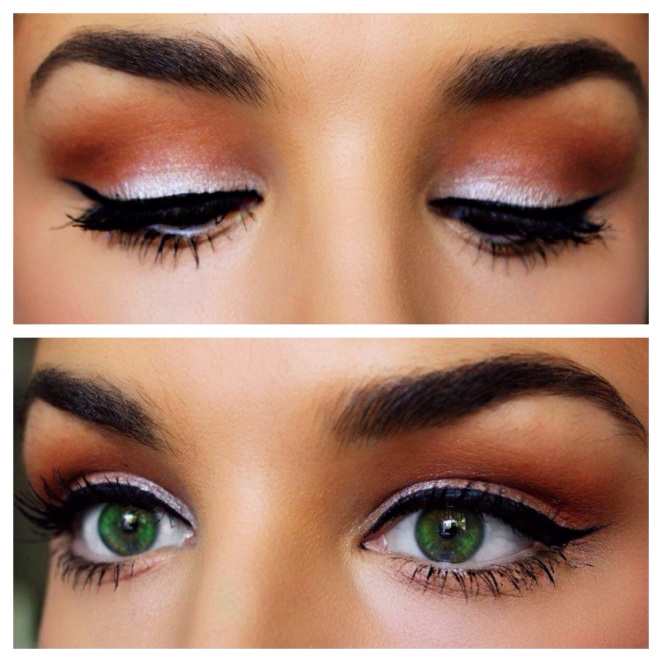
This look is all about the bronze – bronzed skin, bronzed eyes and a natural lip. My gorgeous cousin Georgia let me put this together on her… What do you think? Products are listed below:
Eyes: Mulch, Sable, All That Glitters – Lined the eyes with Dipdown gel liner all by MAC Cosmetics – lashes are coated in Shocking mascara by YSL
Face: Egg Pore Silky Smooth Balm by Tony Moly, Face and Body Foundation by MAC Cosmetics, Corrector by Bobbi Brown, Radiant Creamy Concealer by NARS, contoured with my Sleek Contour Kit in Light and Hot Mama Blush by The Balm.
Lips: On her lips is my favourite natural lip combo of Chanel Rouge Allure in no. 88 with Lip Gloss in Buff 4 by Bobbi Brown – setting it all with my trusty Fix + spray by MAC Cosmetics – all brushes used for her face were by Hair and Makeup Addiction for eyes Sigma.

~ DAY 15 ~
…Favourite Makeup YouTube Guru…
To be honest I couldnt just pick one… So here they are:
Nikkie Tutorials and Susie Morales
I always look forward to seeing what they post – if you’re not following them on Instagram or YouTube then you are LOCO! Do it now! You wont regret it – they are crazy talented, beautiful and hilarious.

~ DAY 16 ~
…Dark Lip Look…
I know this look isn’t for everyone but I actually quite liked it. Please excuse the horrid photo… I had to take it on my iPhone at work… Details are below:
Started off by priming my lips with my delicious lip scrub by Lush I then lined and filled in my lips using Currant Lip Pencil by MAC Cosmetics. I then take my new Cremesheen Lipstick in Hang-Up again by MAC Cosmetics

~ DAY 17 ~
…Glitter…
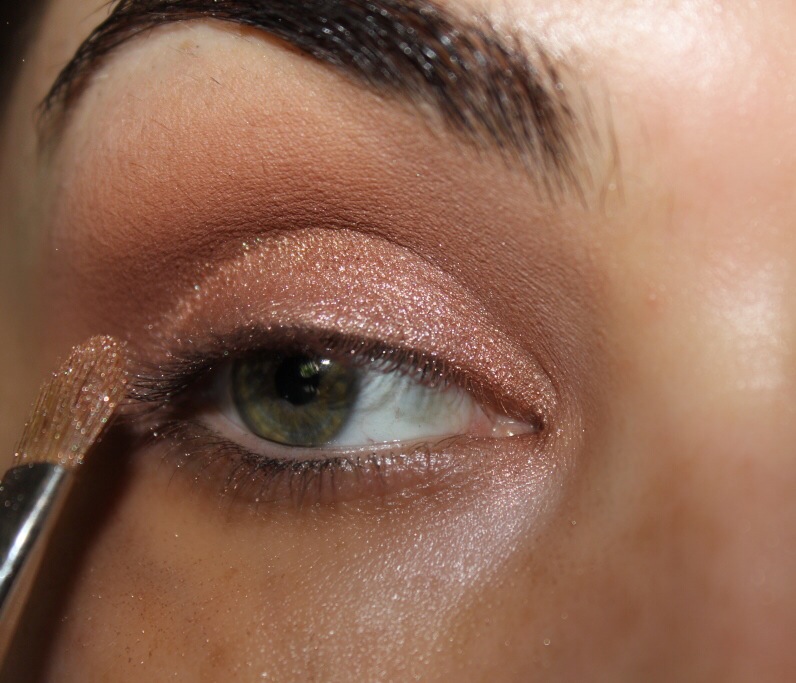
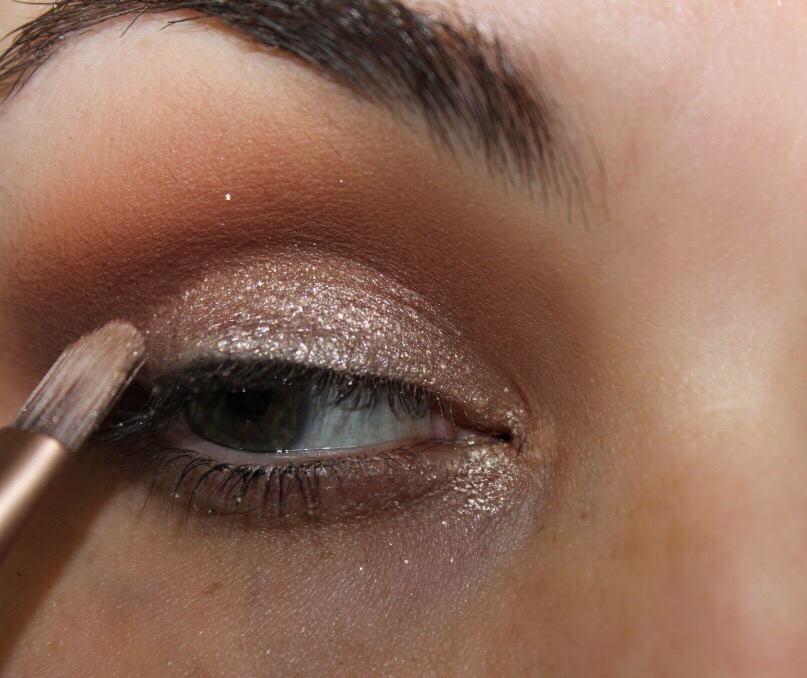
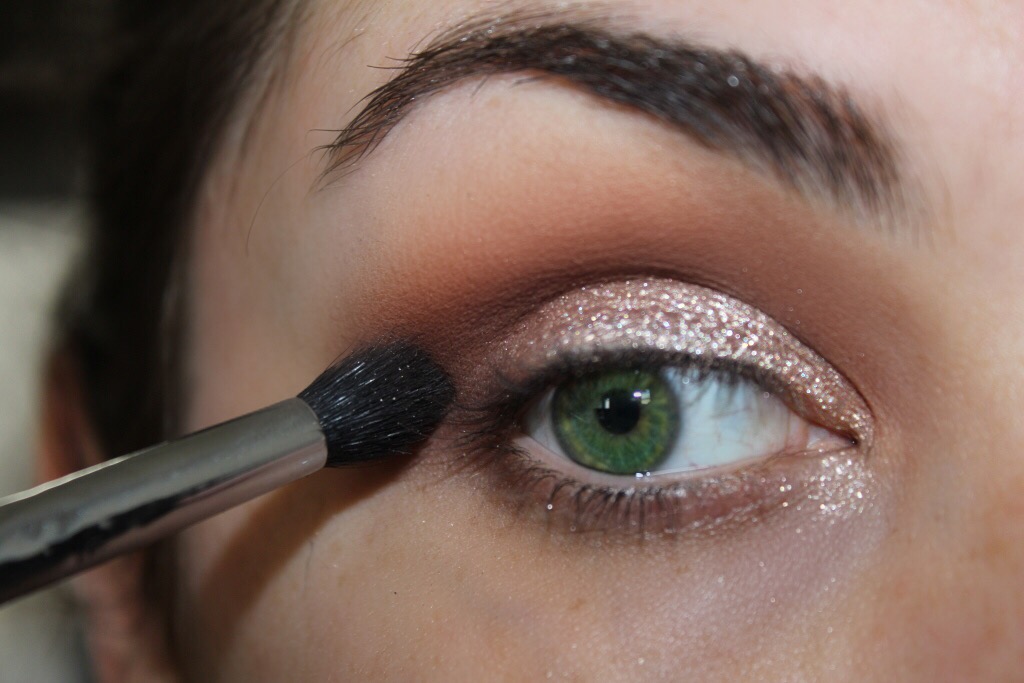
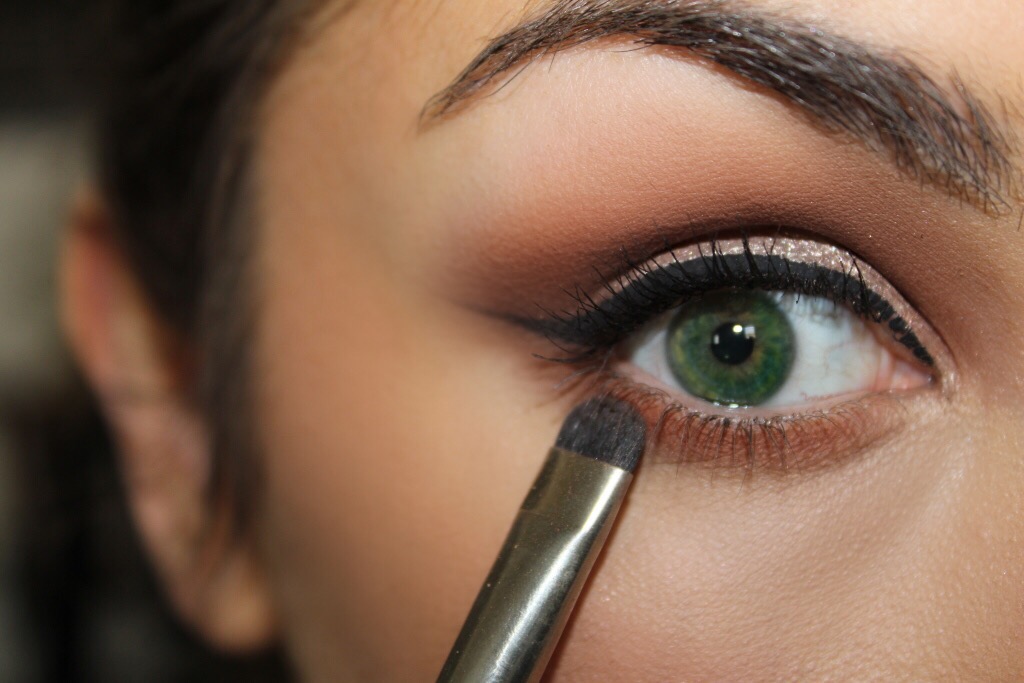
Today’s look is all about the sparkle – this is something you could wear out at night for a special occasion or if you just want to do something different… Details are as follows:
In the crease I used Haux by MAC Cosmetics, on the lid I packed on Shimma Shimma by Makeup Geek. Now for for the key to this look I take my Secret Weapon Adhesive by Shop Violet Voss I place it over the top of my lid then taking Wendy Glitter by Shop Violet Voss I place that on top. Going back into my crease with Haux again I re-define the crease. Finishing off the look using my Glam Eyes Liquid Liner by Rimmel I line my lash line extending it out into a slight cat eye flick. Applying a set of No. 1 lashes by Lashes in a Box – all brushes I used for this look came from the Luxury Eyes Kit from Hair and Makeup Addiction.

~ DAY 18 ~
…Music Video Inspired…
Today’s look was inspired by the video from Beyonce’s song Mine feat. Drake. I adore the way her eyes look in this and did my best to recreate it – details are as follows:
Primed my eyes with Shadow Insurance by Too Faced, then taking my Jumbo Eye Pencil in Milk by NYX Cosmetics I place it in the centre of my lid and blending out the edges. Then from the Vice 2 Pallete by Urban Decay I take the colour Prank and pack that onto the inner and outer corners – beldning out edges. On the centure of the lid I put Mermaid by Makeup Geek – ensuring you blend out the edges into the darker colour. Taking Smokeout from the same Vice 2 Pallete adding it over the top of Prank and blending out. Taking Cupcake by Makeup Geek I place that in my crease – to darken the crease further I use no. 136 eyeshadow by Kiko Cosmetics. I then line my lash line using Lovesick again, from the Vice 2 Pallete and on my lower lash line I use Damaged by from the same palette. Finish off the look using a few coats of Le Volume De Chanel Mascara.

~ DAY 19 ~
…Favourite Hairstyle…
I’m not very good with hair so this is my go to style when I’m going out and want to do something other than straight or in a bun. To get these loose curls I used my holy grail 6 in 1 Complete Curler Set by BellaMi Hair. This curling iron is the ONLY one that has ever actually been able to get my hair to curl and hold he curl. It is so easy to use and doesn’t damage my hair at all! I am completely in love with it. For this style here I used the 32mm – 32mm (1 ½ inch) barrel.

~ DAY 20 ~
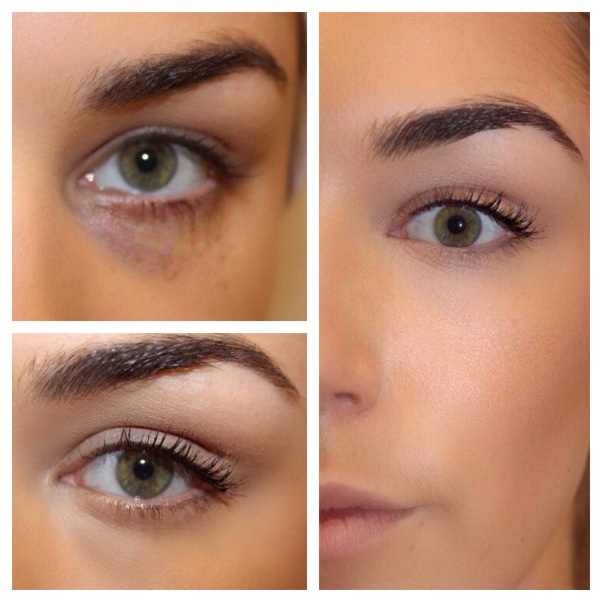
…Concealer…
I don’t know about you but I have dark purple under eye circles my – which when I’m over tired or sick only darken more. For years I struggled with them and it wasn’t till I was introduced to Bobbi Brown’s Corrector. This is amazing, because it is pink- or peach-based it neutralises under-eye darkness so when I apply my concealer it will actually conceal the darkness and brighten up my under eye. The concealer I’ve used here is Radiant Creamy Concealer by NARS – now you can either leave it here or you can add an illuminator like I do. the one I use it Prep + Prime Highlighter in Bright Forecast by MAC Cosmetics – I then set with Le Blanc Fresh Glow Brightening Powder by Chanel as you can see I’ve canceled out my dark under eye circles, concealed them whilst brightening the area as well.
Well I hope you enjoy this belated second post…
Till next time xoxo


 While its not an overly complicated look, i think it has great impact mainly because of the gorgeous feature shade – I Heart This by ColourPop. So have a look and let me know what you think or if you give this a try at home.